> ## Documentation Index
> Fetch the complete documentation index at: https://wundergraphinc-docs-fix-3303-emit-event-rename.mintlify.site/llms.txt
> Use this file to discover all available pages before exploring further.

# Okta

> Setting up SSO with Okta

### Steps to set Okta as an OIDC identity provider

<Steps>
  <Step>
    Navigate to the Applications view within your Okta Administrator Dashboard.
  </Step>

  <Step>
    Click on **Create App Integration**.
  </Step>

  <Step>
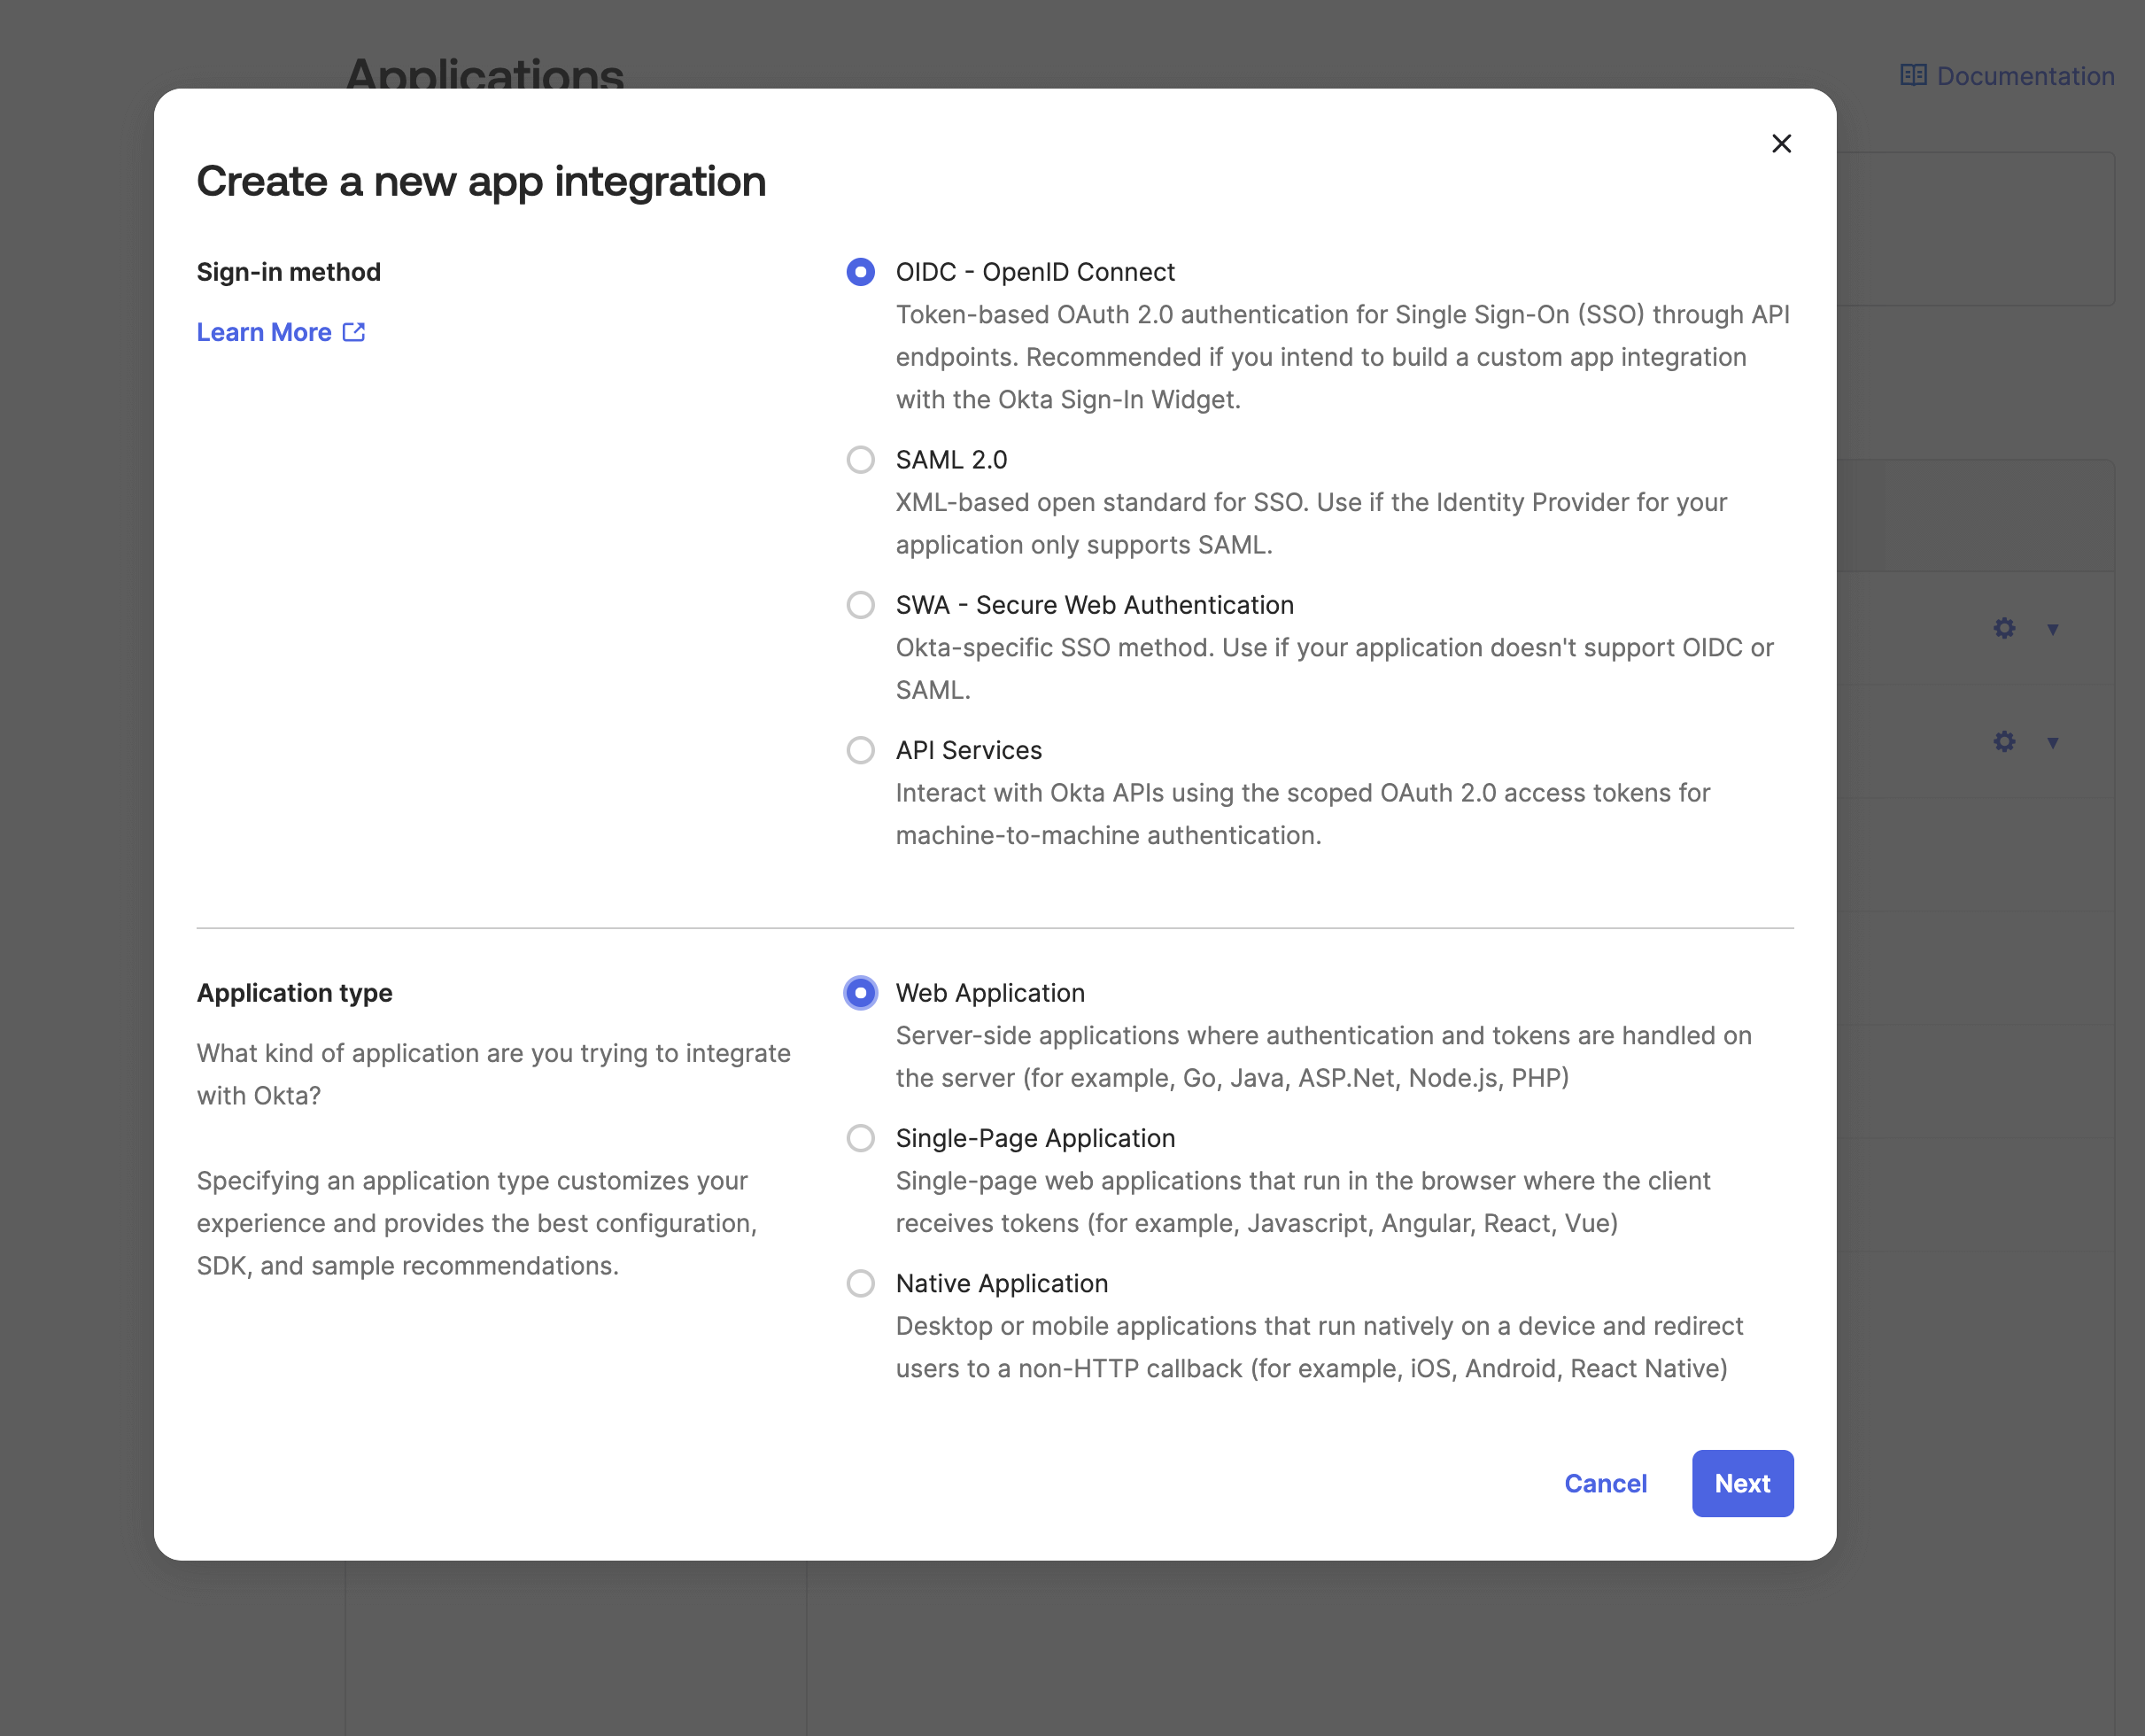
    A dialog appears, select **OIDC - OpenID Connect** as the sign-in method.
  </Step>

  <Step>
    For the application type, select **Web Application** and click on **Next**.
    <Frame>
      <img src="https://mintcdn.com/wundergraphinc-docs-fix-3303-emit-event-rename/bxKGTA1A0T39pAoA/images/studio/sso/create-new-app-integration-setup.png?fit=max&auto=format&n=bxKGTA1A0T39pAoA&q=85&s=db3a2fa405200e8f37f41eb6752c6f2a" alt="Create new app integration page for selecting sign-in method and application type" title="Create new app integration setup" width="2422" height="1960" data-path="images/studio/sso/create-new-app-integration-setup.png" />
    </Frame>
  </Step>

  <Step>
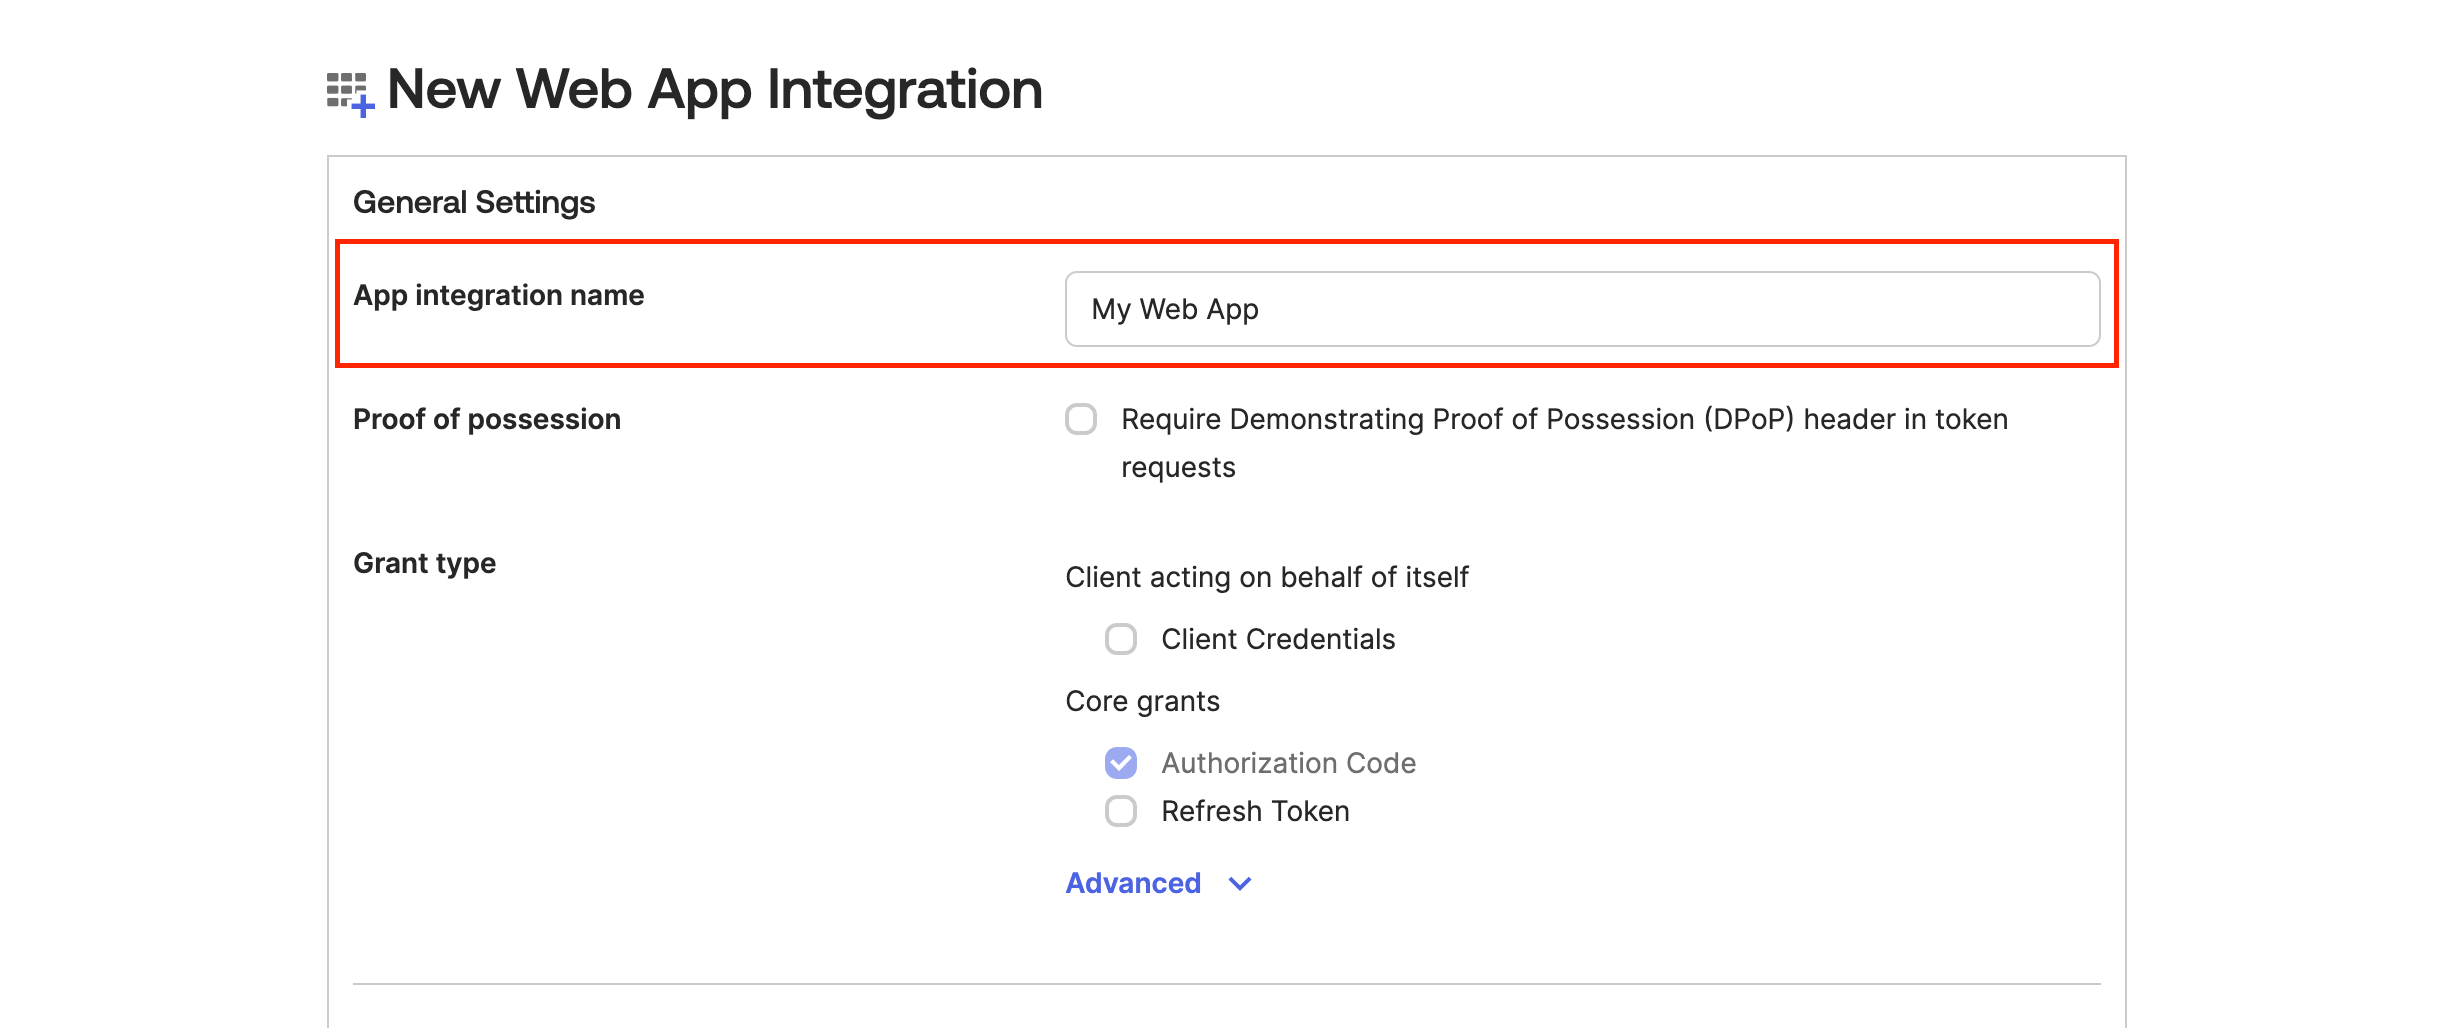
    Now give the app a name.

    <Frame>
      <img src="https://mintcdn.com/wundergraphinc-docs-fix-3303-emit-event-rename/bxKGTA1A0T39pAoA/images/studio/sso/app-integration-name-settings.png?fit=max&auto=format&n=bxKGTA1A0T39pAoA&q=85&s=be8d398f6729d09e0b156764c25d4ea8" alt="Web app integration settings showing App integration name field set to My Web App" title="App integration name settings" width="2438" height="1028" data-path="images/studio/sso/app-integration-name-settings.png" />

      />
    </Frame>
  </Step>

  <Step>
    For **Grant Type,** keep the defaults.
  </Step>

  <Step>
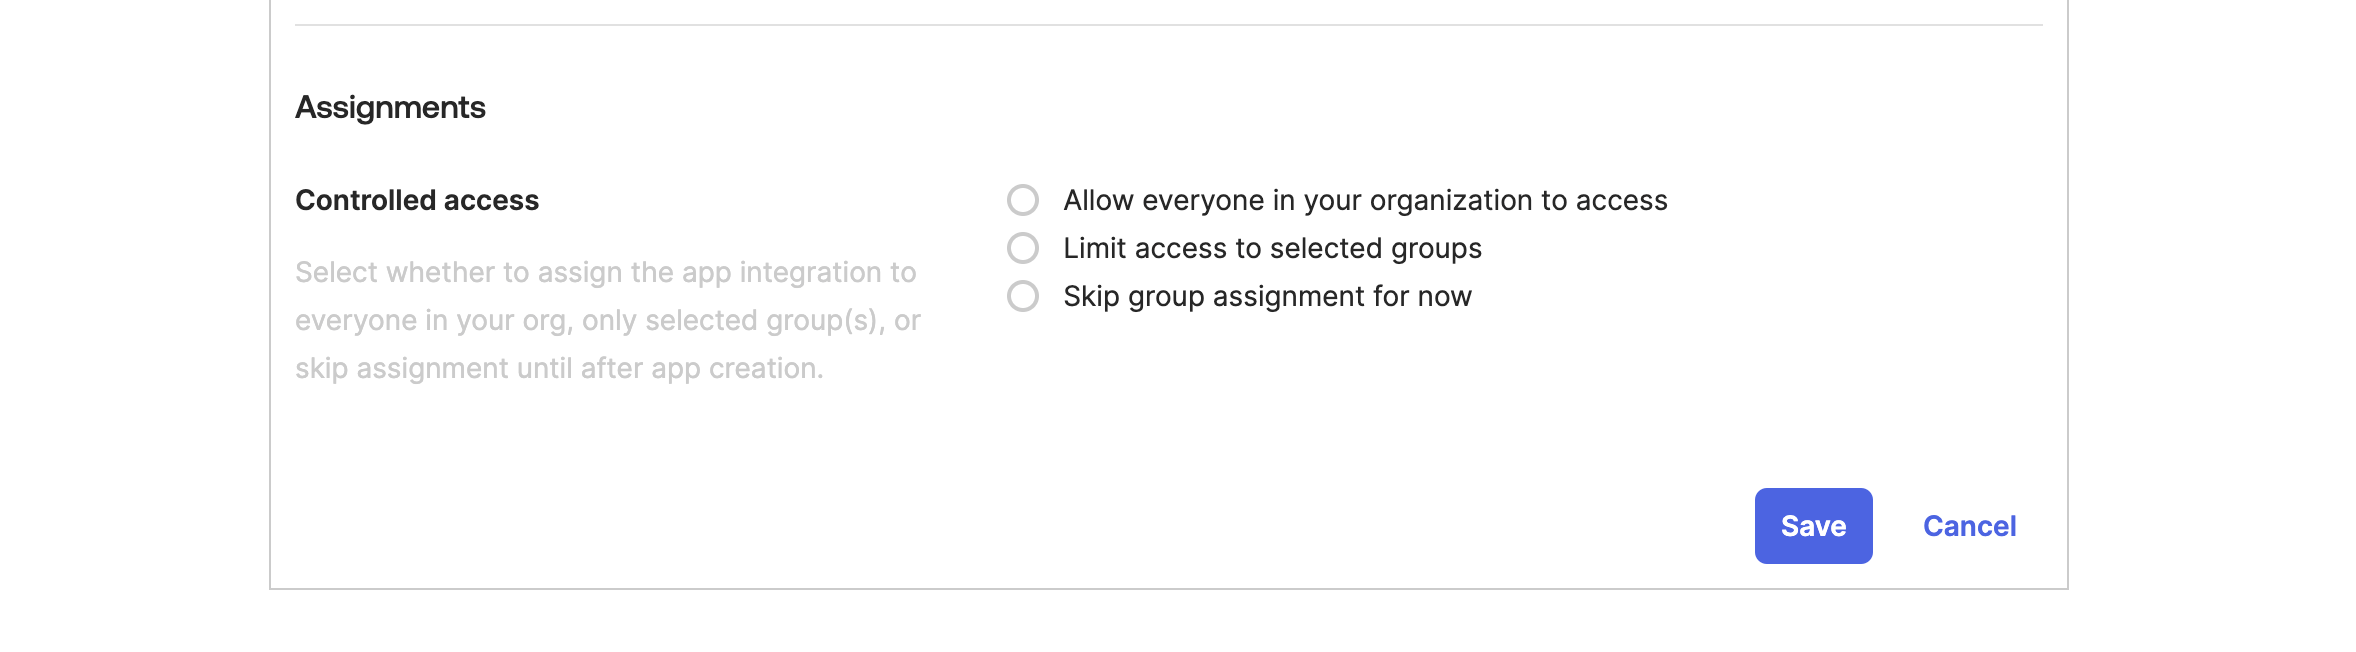
    Scroll down to the **Assignments** section and select one of the options based on your choice and then click on **Save.**
    <Frame>
      <img src="https://mintcdn.com/wundergraphinc-docs-fix-3303-emit-event-rename/bxKGTA1A0T39pAoA/images/studio/sso/assign-controlled-access-to-app.png?fit=max&auto=format&n=bxKGTA1A0T39pAoA&q=85&s=b184fde7b8add43056b1ad01f1173867" alt="Cosmo Docs access assignment dialog with options for group or org-wide access" title="Assign controlled access to app" width="2356" height="652" data-path="images/studio/sso/assign-controlled-access-to-app.png" />

      />
    </Frame>
  </Step>

  <Step>
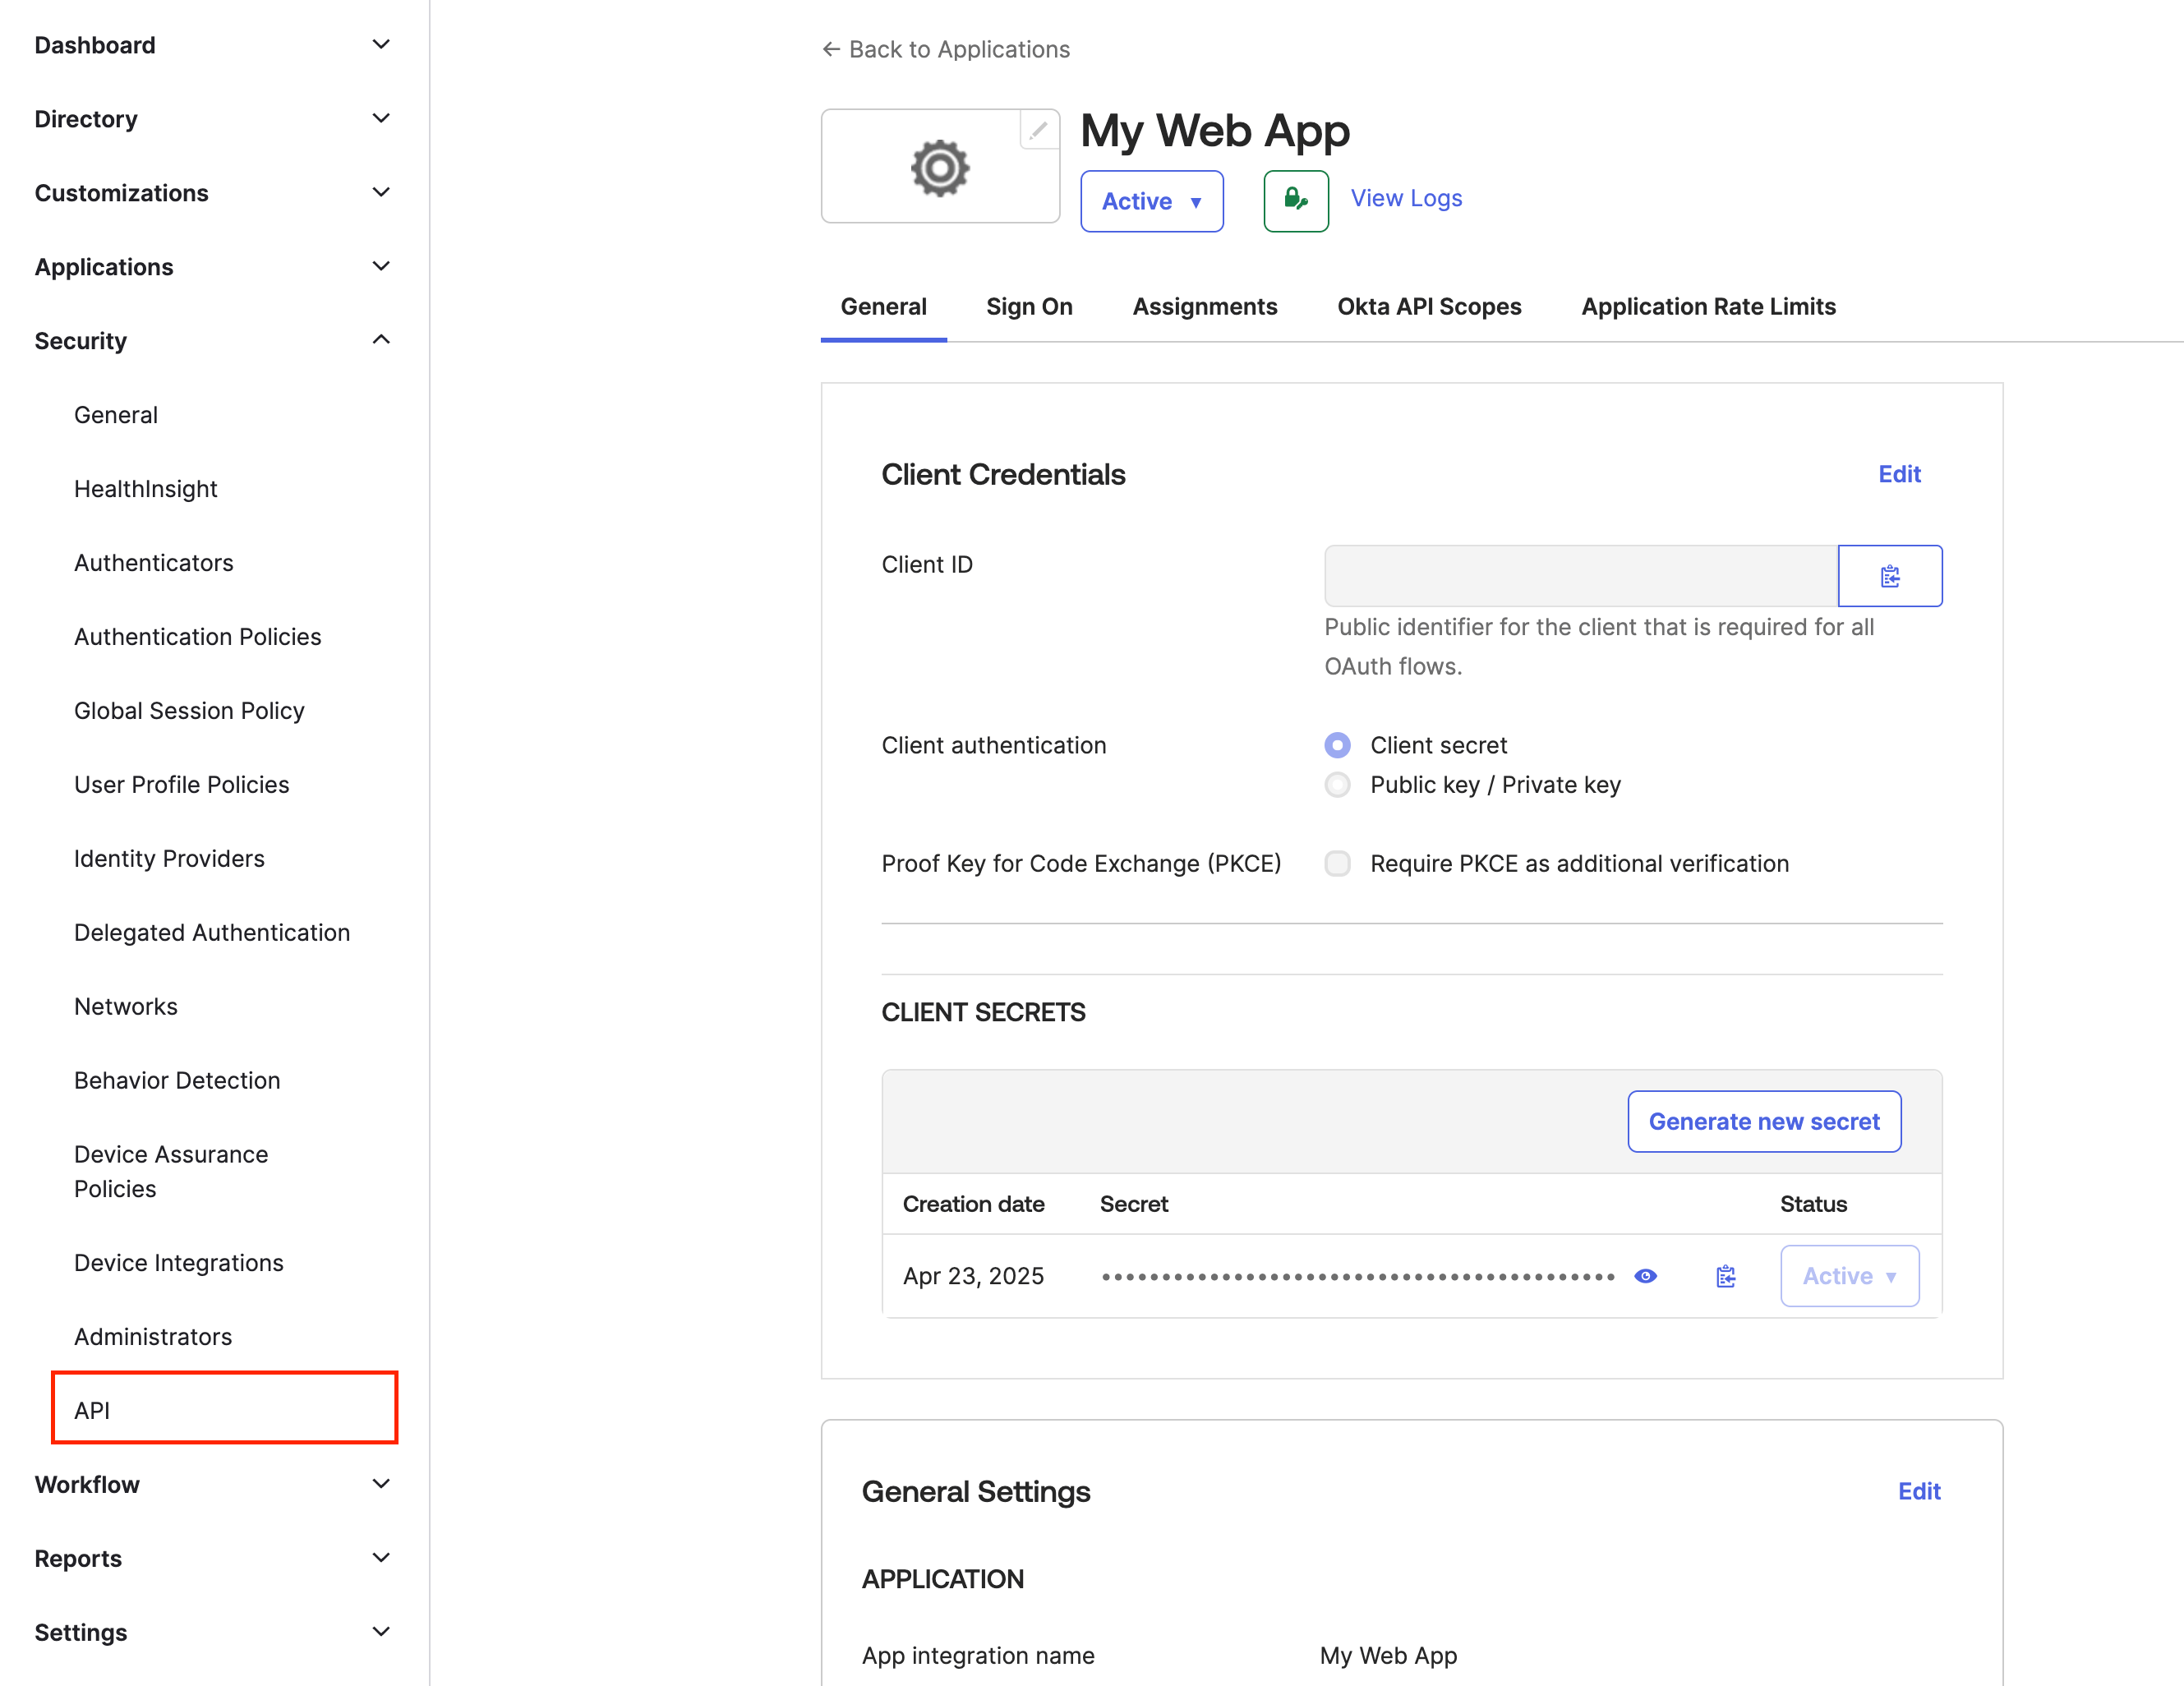
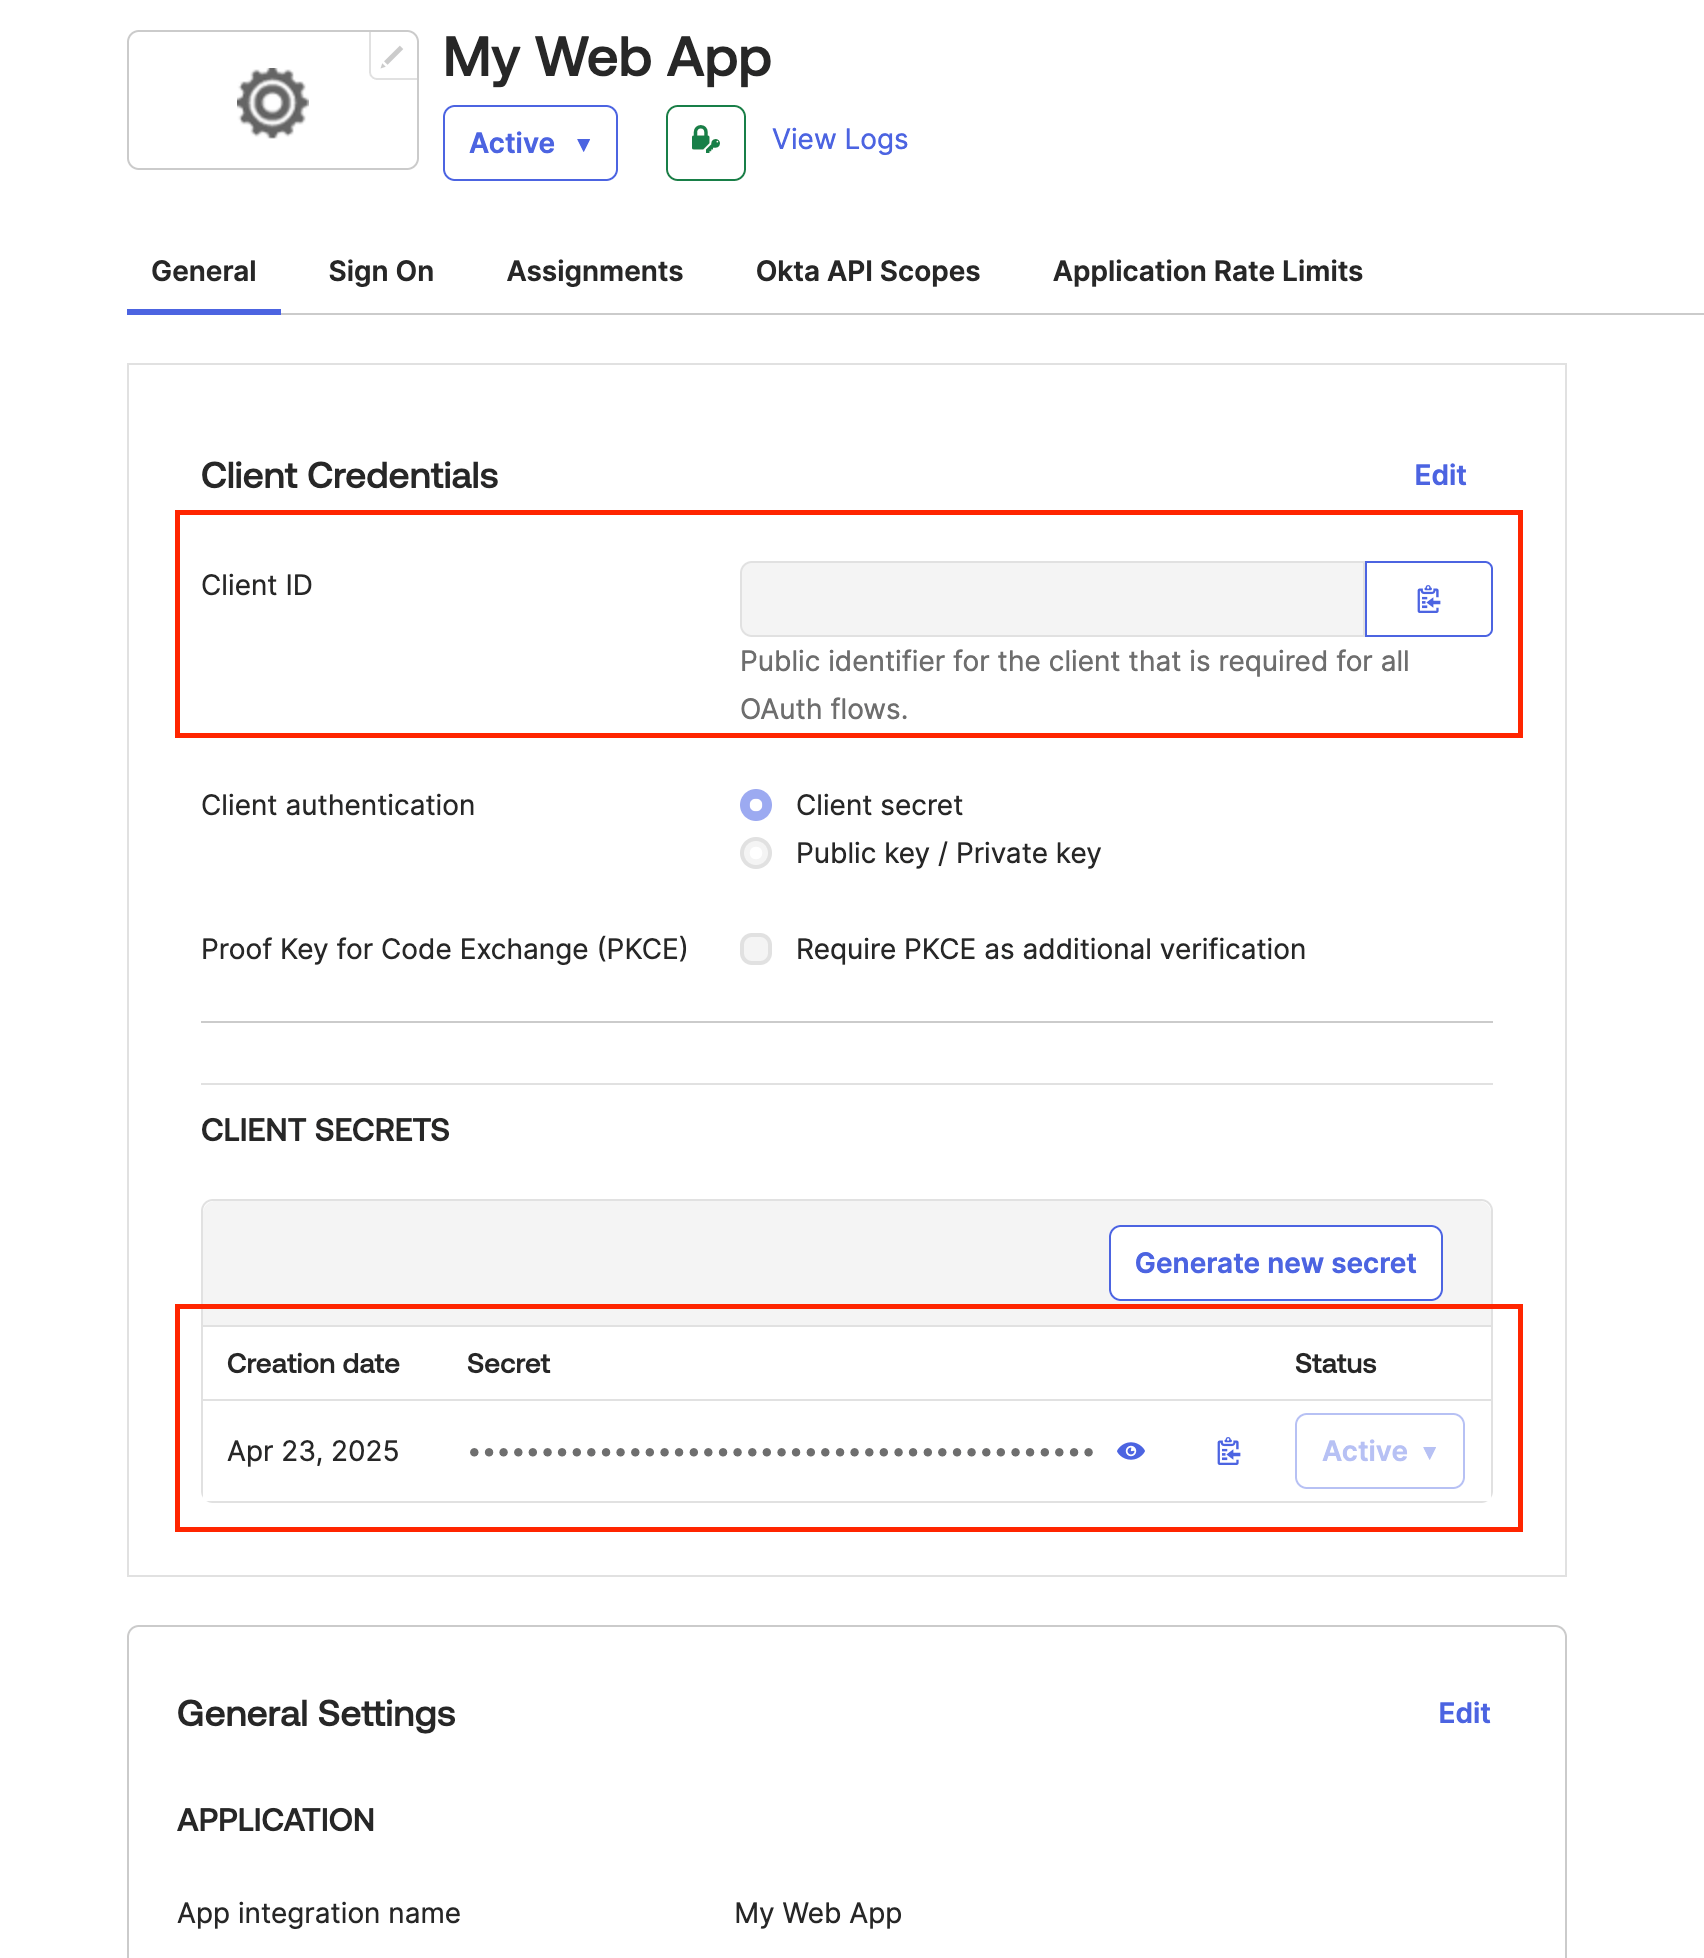
    Copy the **Client ID** and **Client Secret.**
    <Frame>
      <img src="https://mintcdn.com/wundergraphinc-docs-fix-3303-emit-event-rename/bxKGTA1A0T39pAoA/images/studio/sso/client-credentials-editing-view.png?fit=max&auto=format&n=bxKGTA1A0T39pAoA&q=85&s=098207d085073f7d4453beb81936def7" alt="Client Credentials section editing client ID for OAuth flows" title="Client credentials editing view" width="1704" height="1958" data-path="images/studio/sso/client-credentials-editing-view.png" />
    </Frame>
  </Step>

  <Step>
    Navigate to **Security** -> **API**.

    <Frame>
      <img src="https://mintcdn.com/wundergraphinc-docs-fix-3303-emit-event-rename/bxKGTA1A0T39pAoA/images/studio/sso/edit-client-credentials-for-web-app.png?fit=max&auto=format&n=bxKGTA1A0T39pAoA&q=85&s=0b14f07c1099c3be7a17f0a3679afab6" alt="Client Credentials section editing client ID and authentication settings" title="Edit client credentials for web app" width="2658" height="2052" data-path="images/studio/sso/edit-client-credentials-for-web-app.png" />
    </Frame>
  </Step>

  <Step>
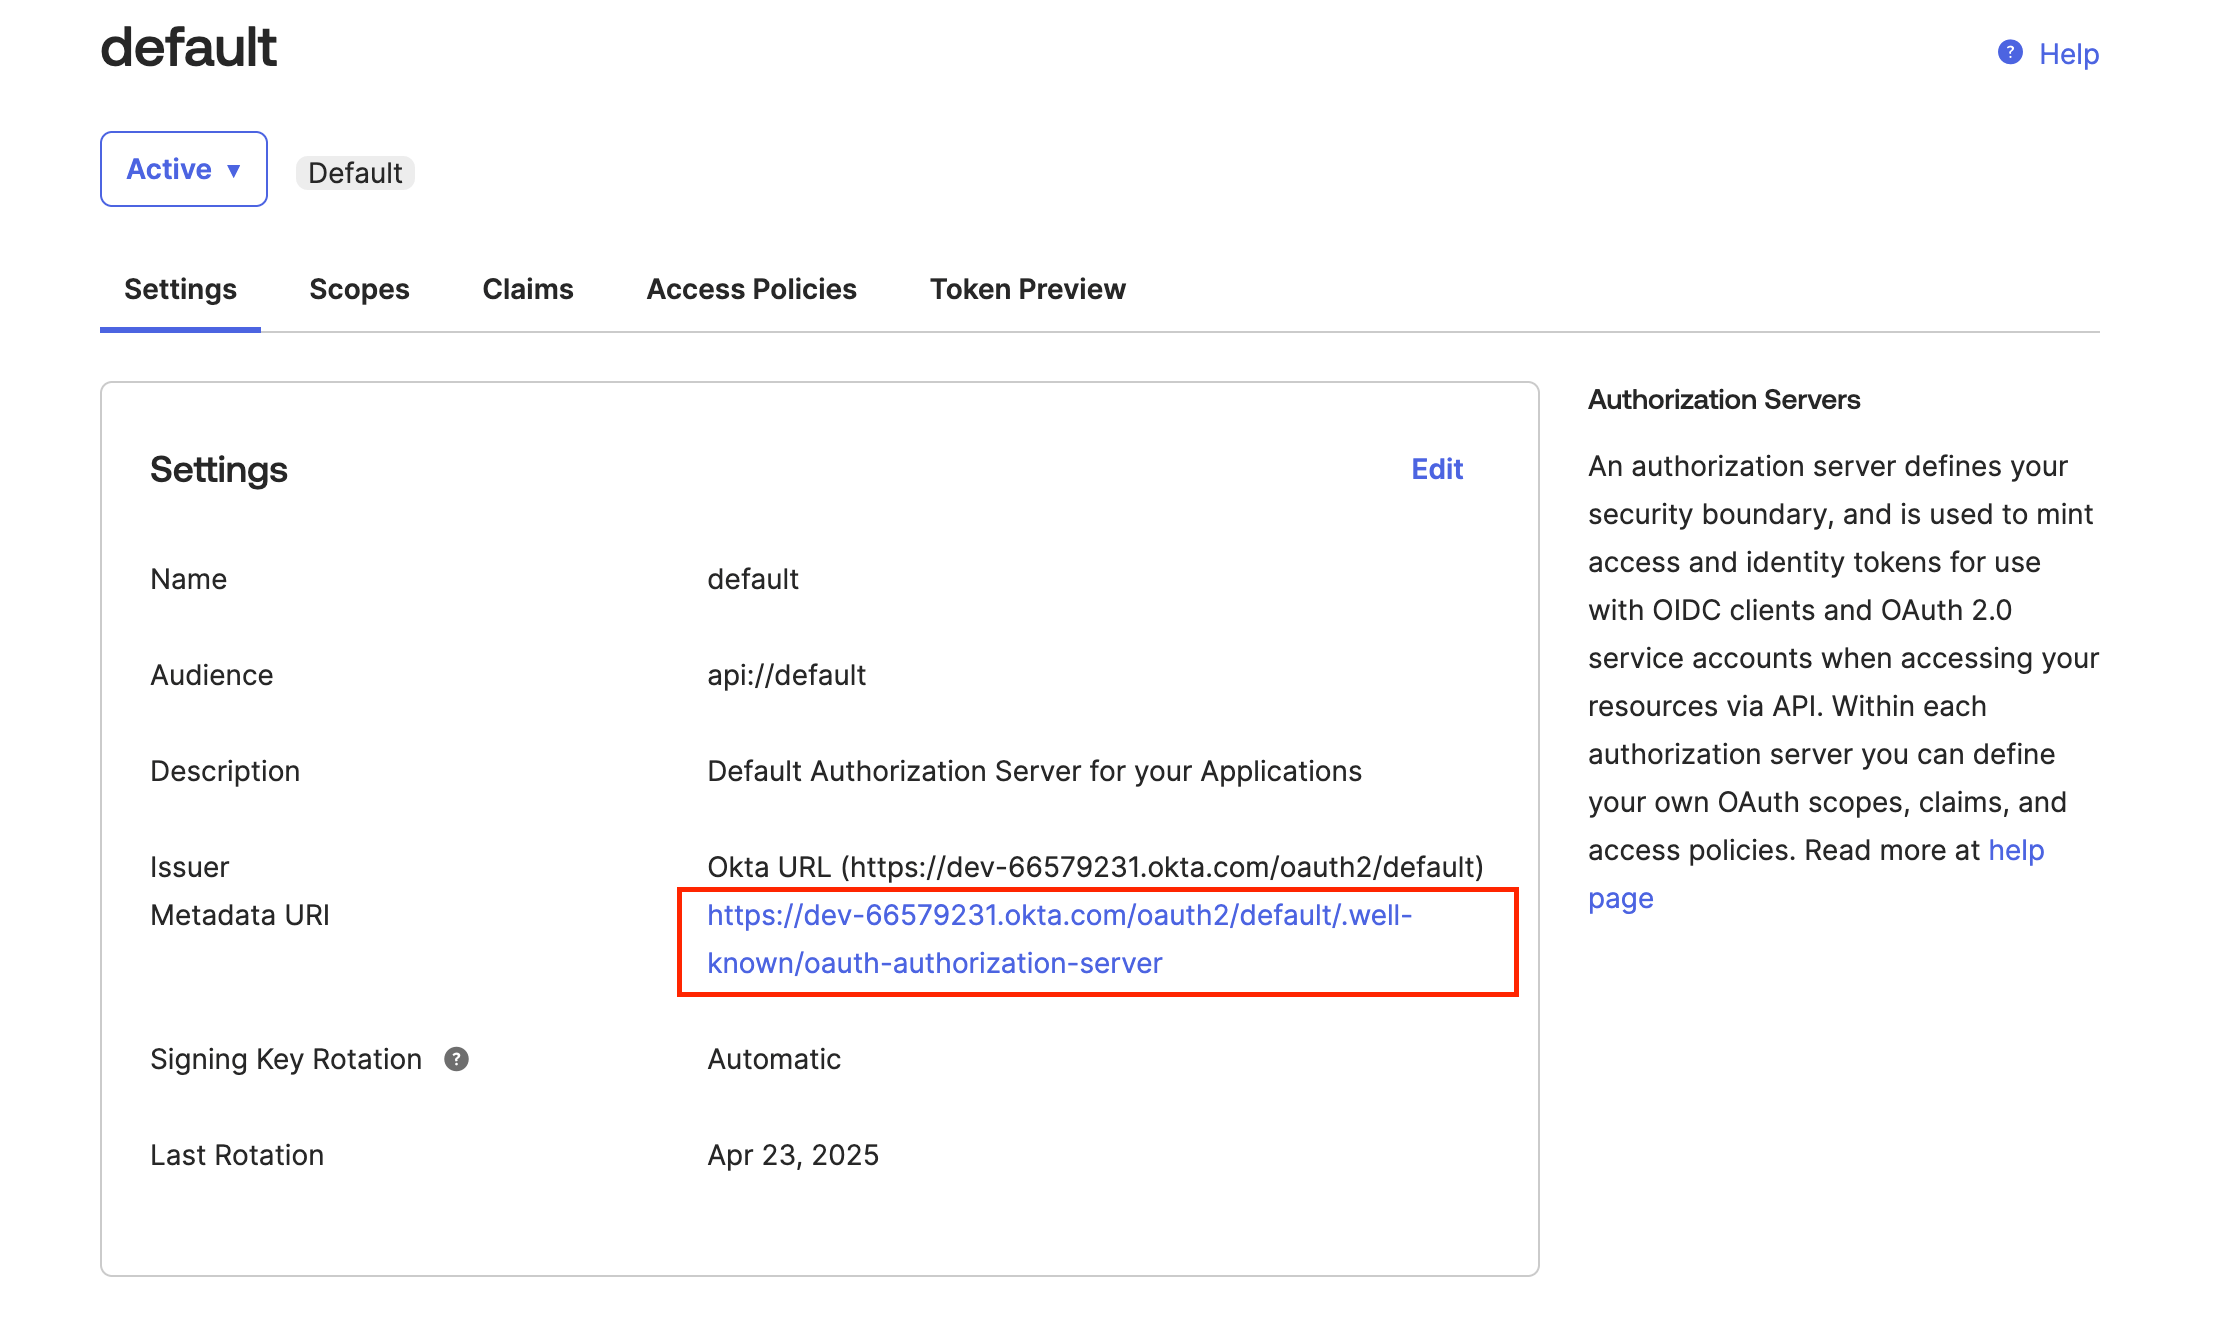
    Select the **default** authorization server.
  </Step>

  <Step>
    Copy the **Metadata URI.**

    <Frame>
      <img src="https://mintcdn.com/wundergraphinc-docs-fix-3303-emit-event-rename/bxKGTA1A0T39pAoA/images/studio/sso/default-authorization-server-metadata.png?fit=max&auto=format&n=bxKGTA1A0T39pAoA&q=85&s=8a13152ff9cbb07f15c72fa14dd8f19c" alt="Default authorization server settings highlighting metadata URI in Cosmo Docs" title="Default authorization server metadata" width="2218" height="1342" data-path="images/studio/sso/default-authorization-server-metadata.png" />
    </Frame>
  </Step>

  <Step>
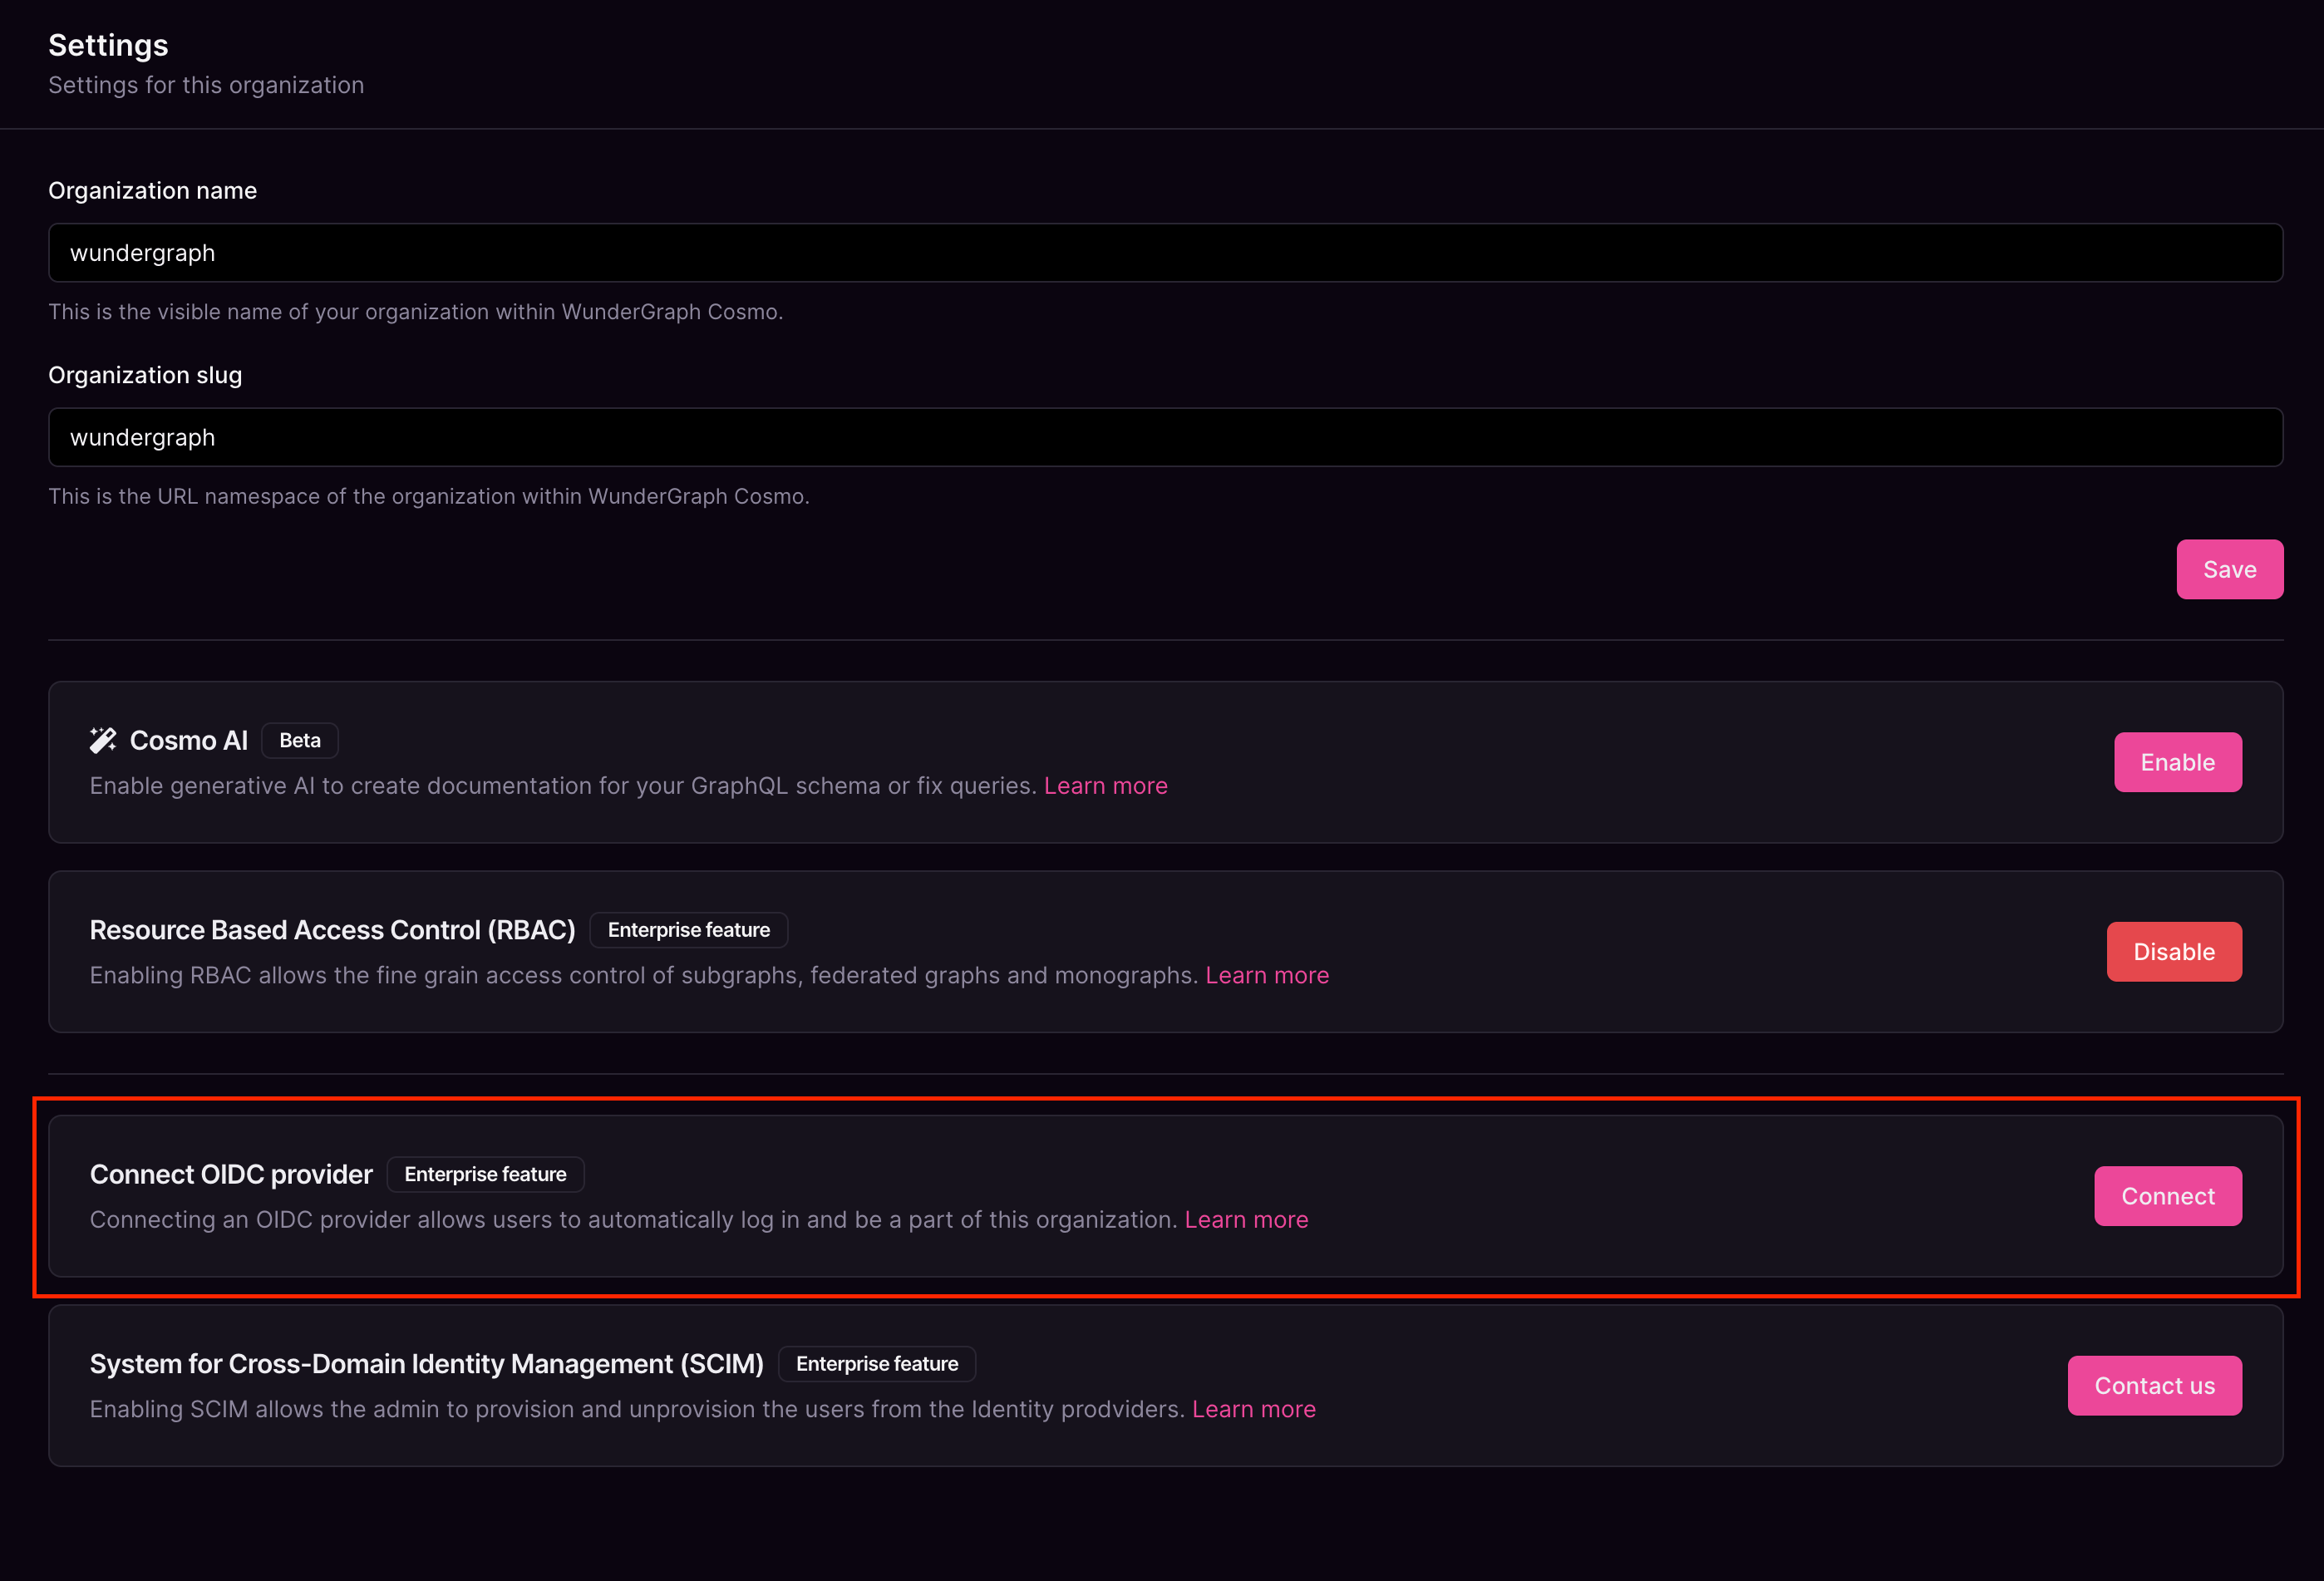
    Navigate to the settings page on Cosmo.
    <Frame>
      <img src="https://mintcdn.com/wundergraphinc-docs-fix-3303-emit-event-rename/bxKGTA1A0T39pAoA/images/studio/sso/organization-settings-with-ai-rbac-scim.png?fit=max&auto=format&n=bxKGTA1A0T39pAoA&q=85&s=5400fa35fd05ecdbcc162589e5c82bfe" alt="Organization settings showing name, slug, and status of AI, RBAC, and SCIM features" title="Organization settings with AI, RBAC, SCIM" width="2796" height="1902" data-path="images/studio/sso/organization-settings-with-ai-rbac-scim.png" />
    </Frame>
  </Step>

  <Step>
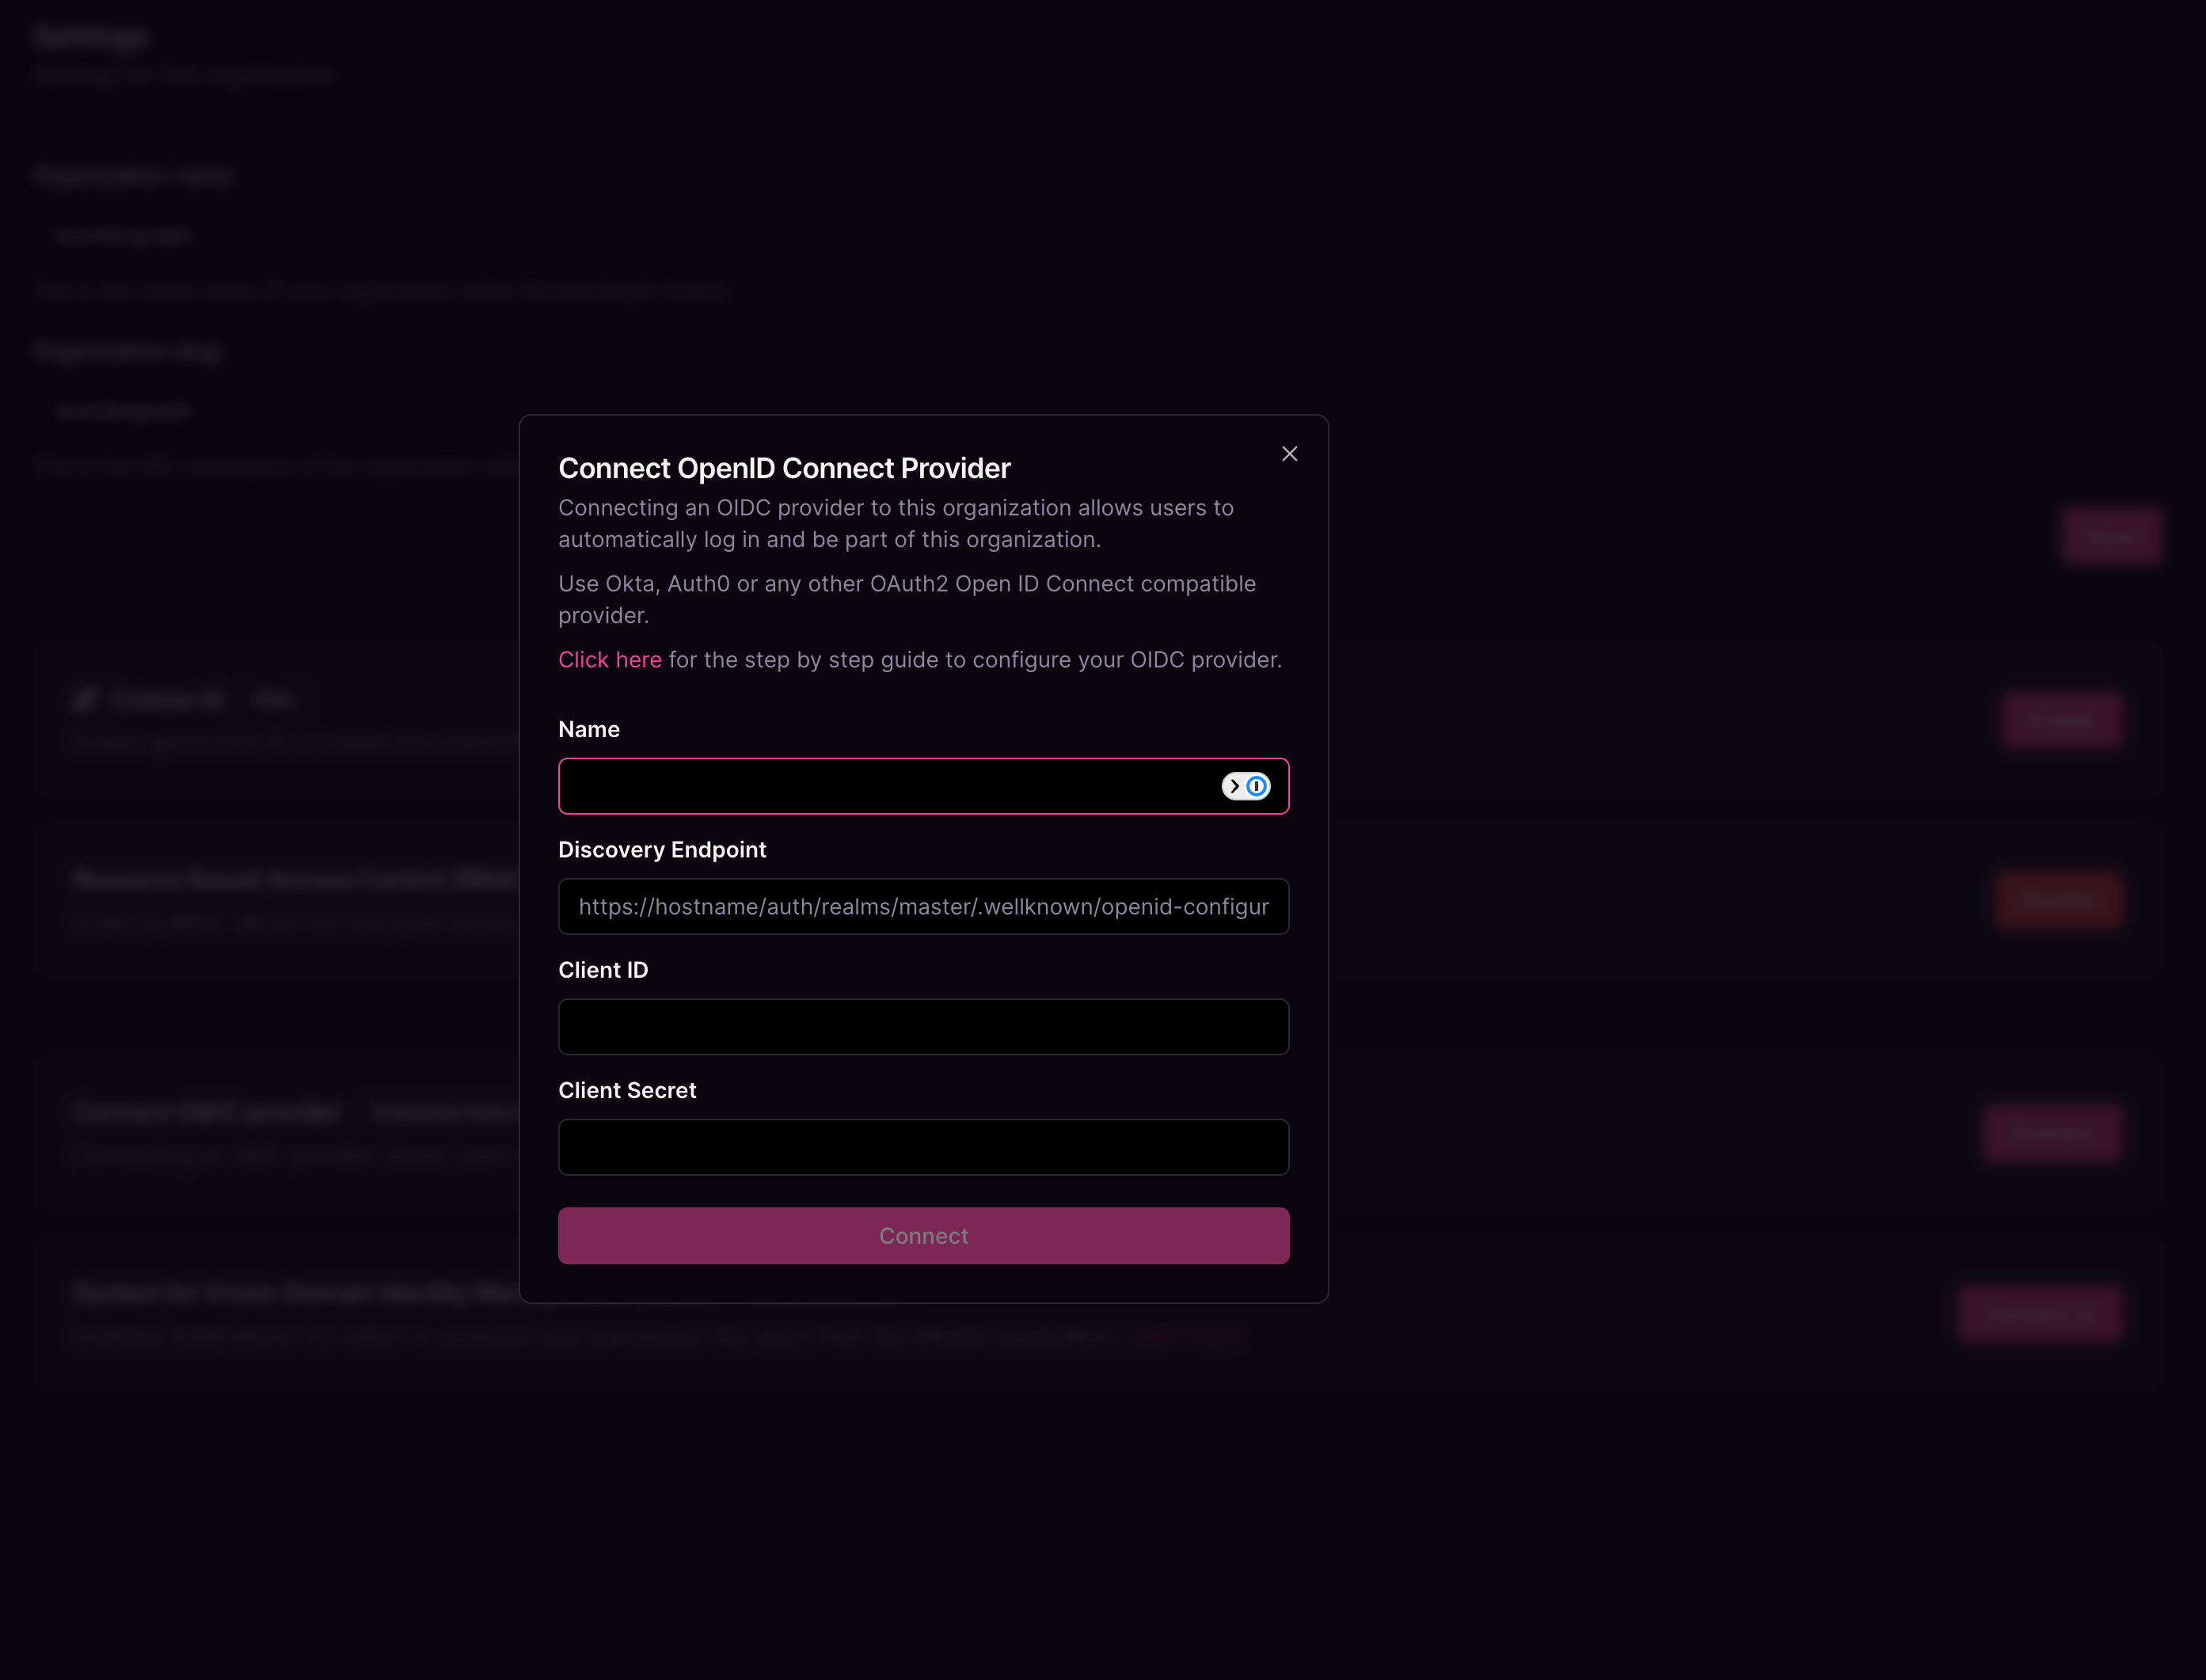
    Give the connection a name, paste the **Metadata URI** copied before, into the  **Discovery Endpoint,**and paste the **Client ID** and  **Client secret** copied before into the **Client ID** and  **Client Secret fields respectively,**and then click on **Connect.**
    <Frame>
      <img src="https://mintcdn.com/wundergraphinc-docs-fix-3303-emit-event-rename/bxKGTA1A0T39pAoA/images/studio/sso/oidc-provider-configuration-form.png?fit=max&auto=format&n=bxKGTA1A0T39pAoA&q=85&s=cbfa6a2a523f82fd6047291ef7d9ac59" alt="Connect OpenID Connect Provider form with fields for name, endpoint, and credentials" title="OIDC provider configuration form" width="2786" height="2122" data-path="images/studio/sso/oidc-provider-configuration-form.png" />
    </Frame>
  </Step>

  <Step>
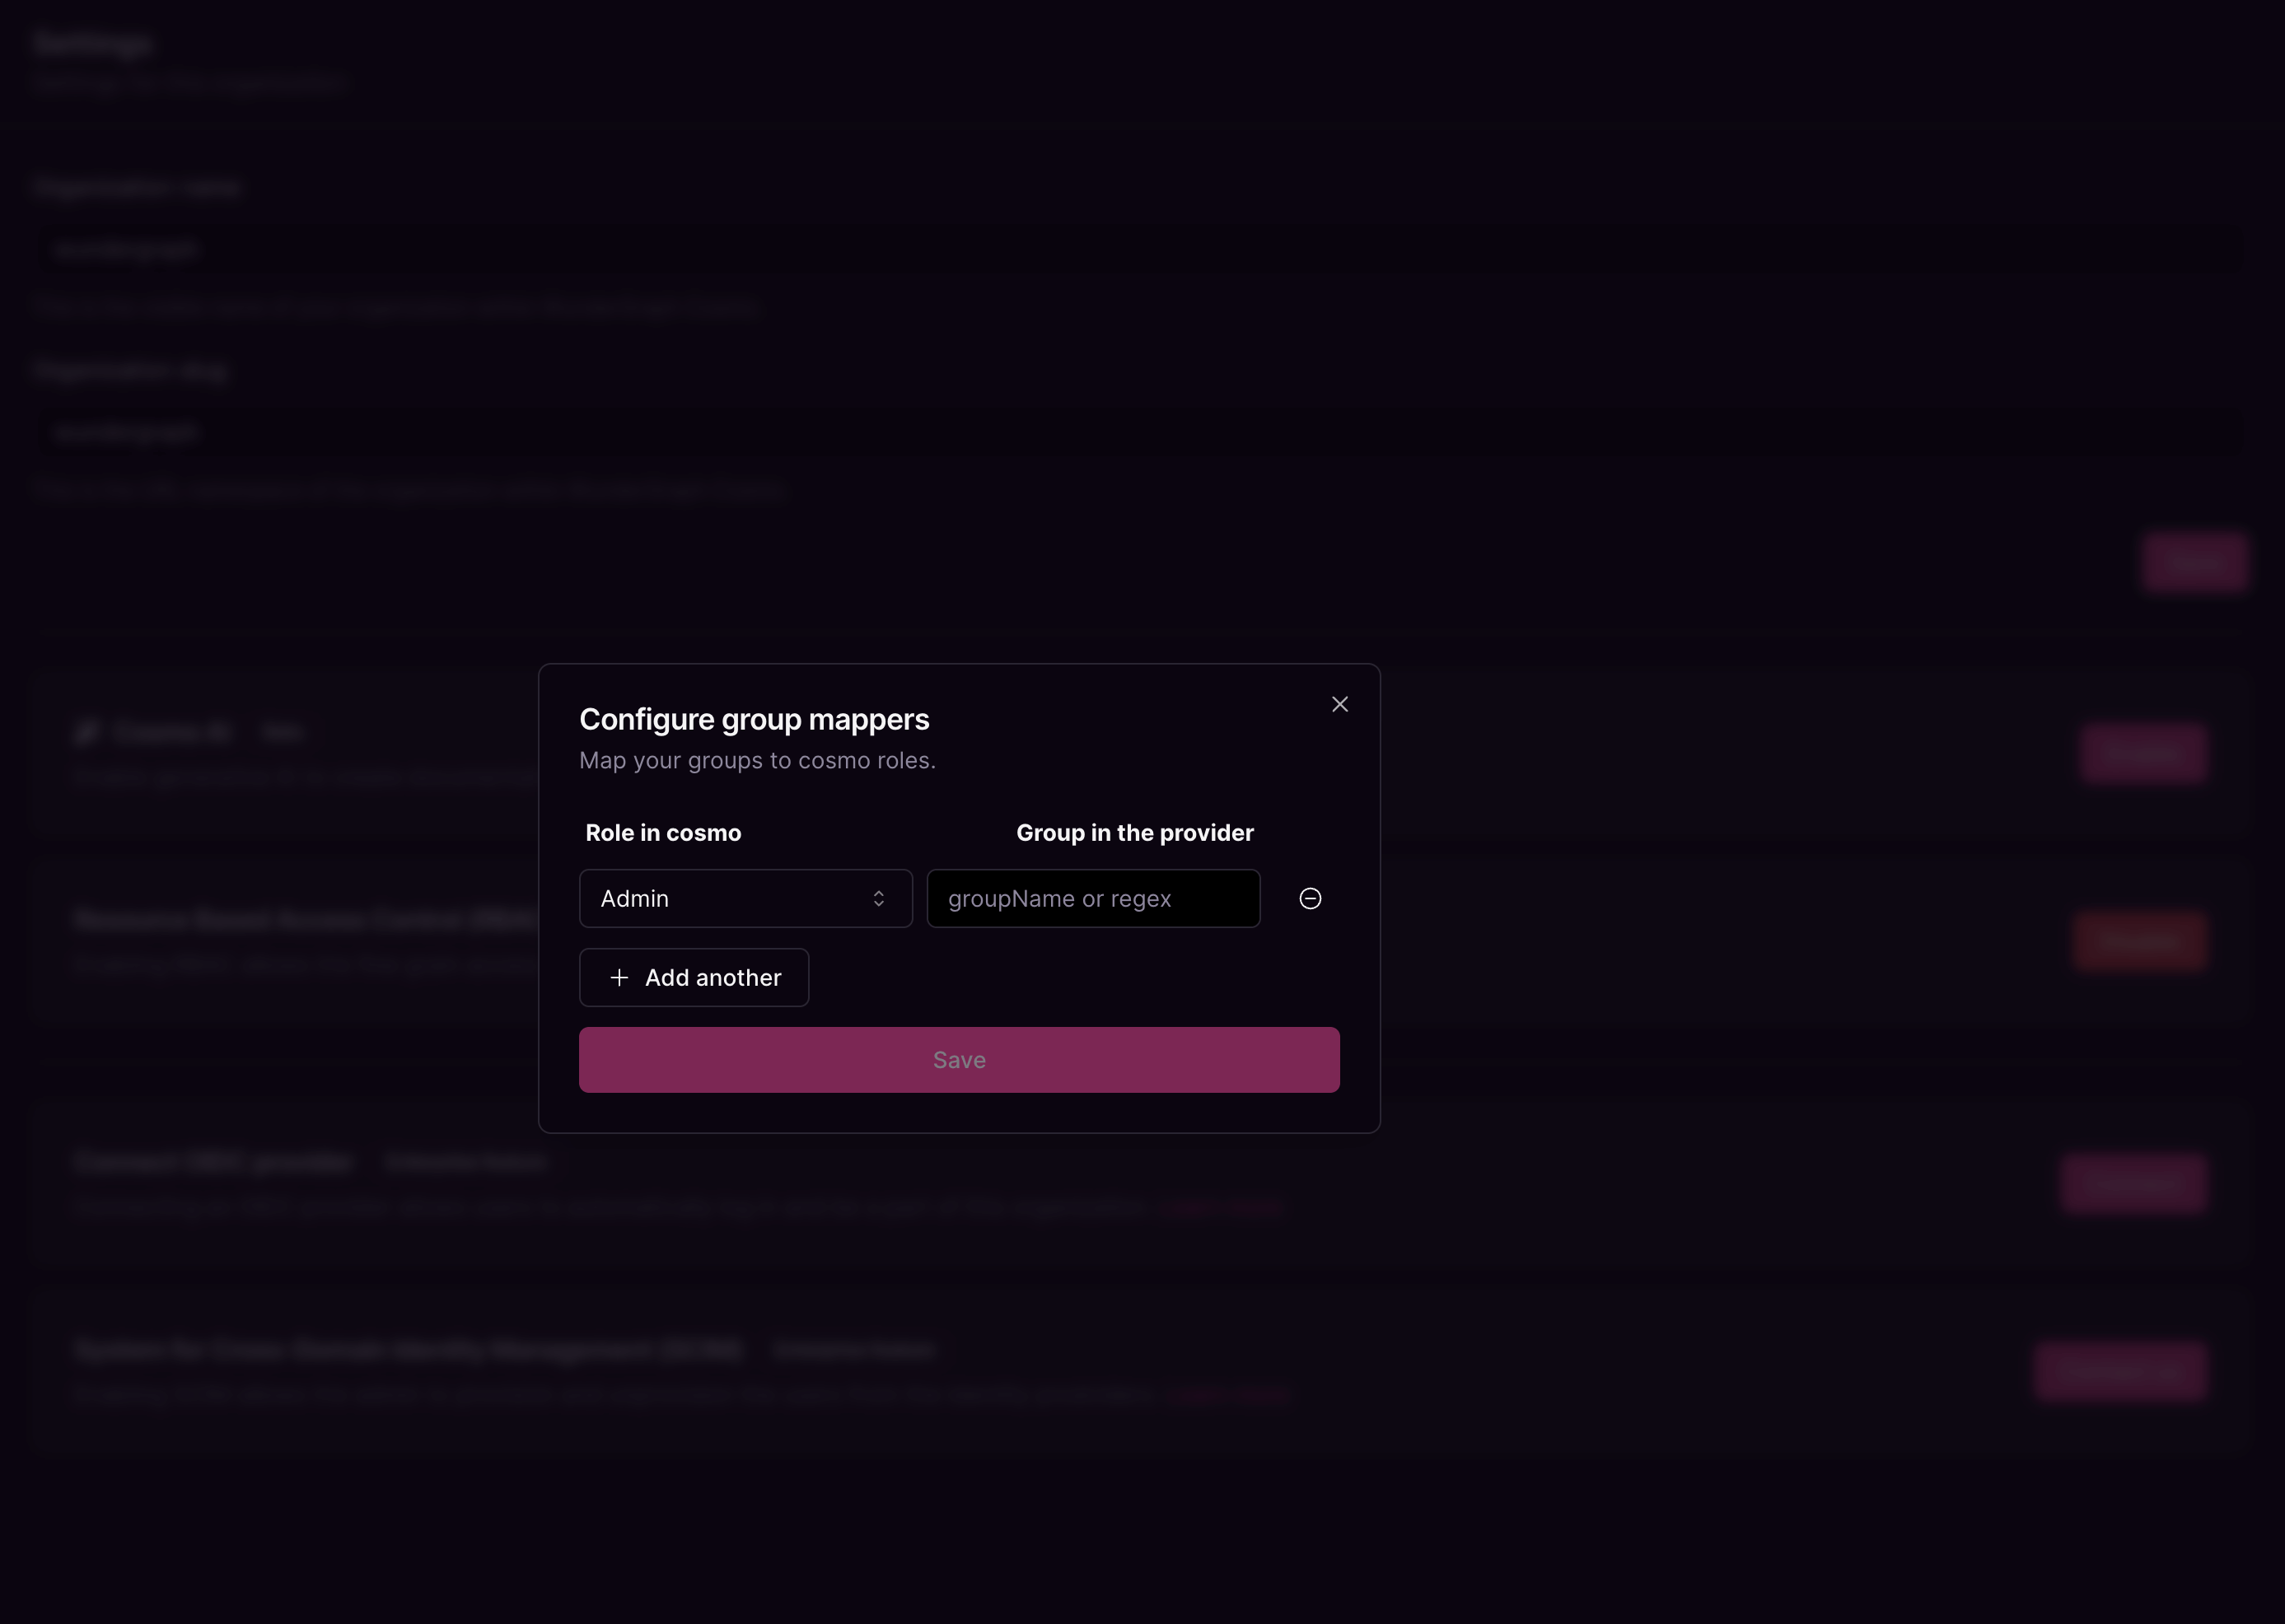
    Configure the mapping between the roles in Cosmo and the user groups in Okta. The field **Group in the provider** can be populated with the name of the group or a regex to match the user groups. Once all the mappers are configured, click on **Save**.
    <Frame>
      <img src="https://mintcdn.com/wundergraphinc-docs-fix-3303-emit-event-rename/bxKGTA1A0T39pAoA/images/studio/sso/group-to-role-mapping-dialog.png?fit=max&auto=format&n=bxKGTA1A0T39pAoA&q=85&s=70b3994ce1191776fe67747ea435d53e" alt="Group mapper configuration dialog linking provider groups to Cosmo roles" title="Group-to-role mapping dialog" width="2774" height="1972" data-path="images/studio/sso/group-to-role-mapping-dialog.png" />
    </Frame>
  </Step>

  <Step>
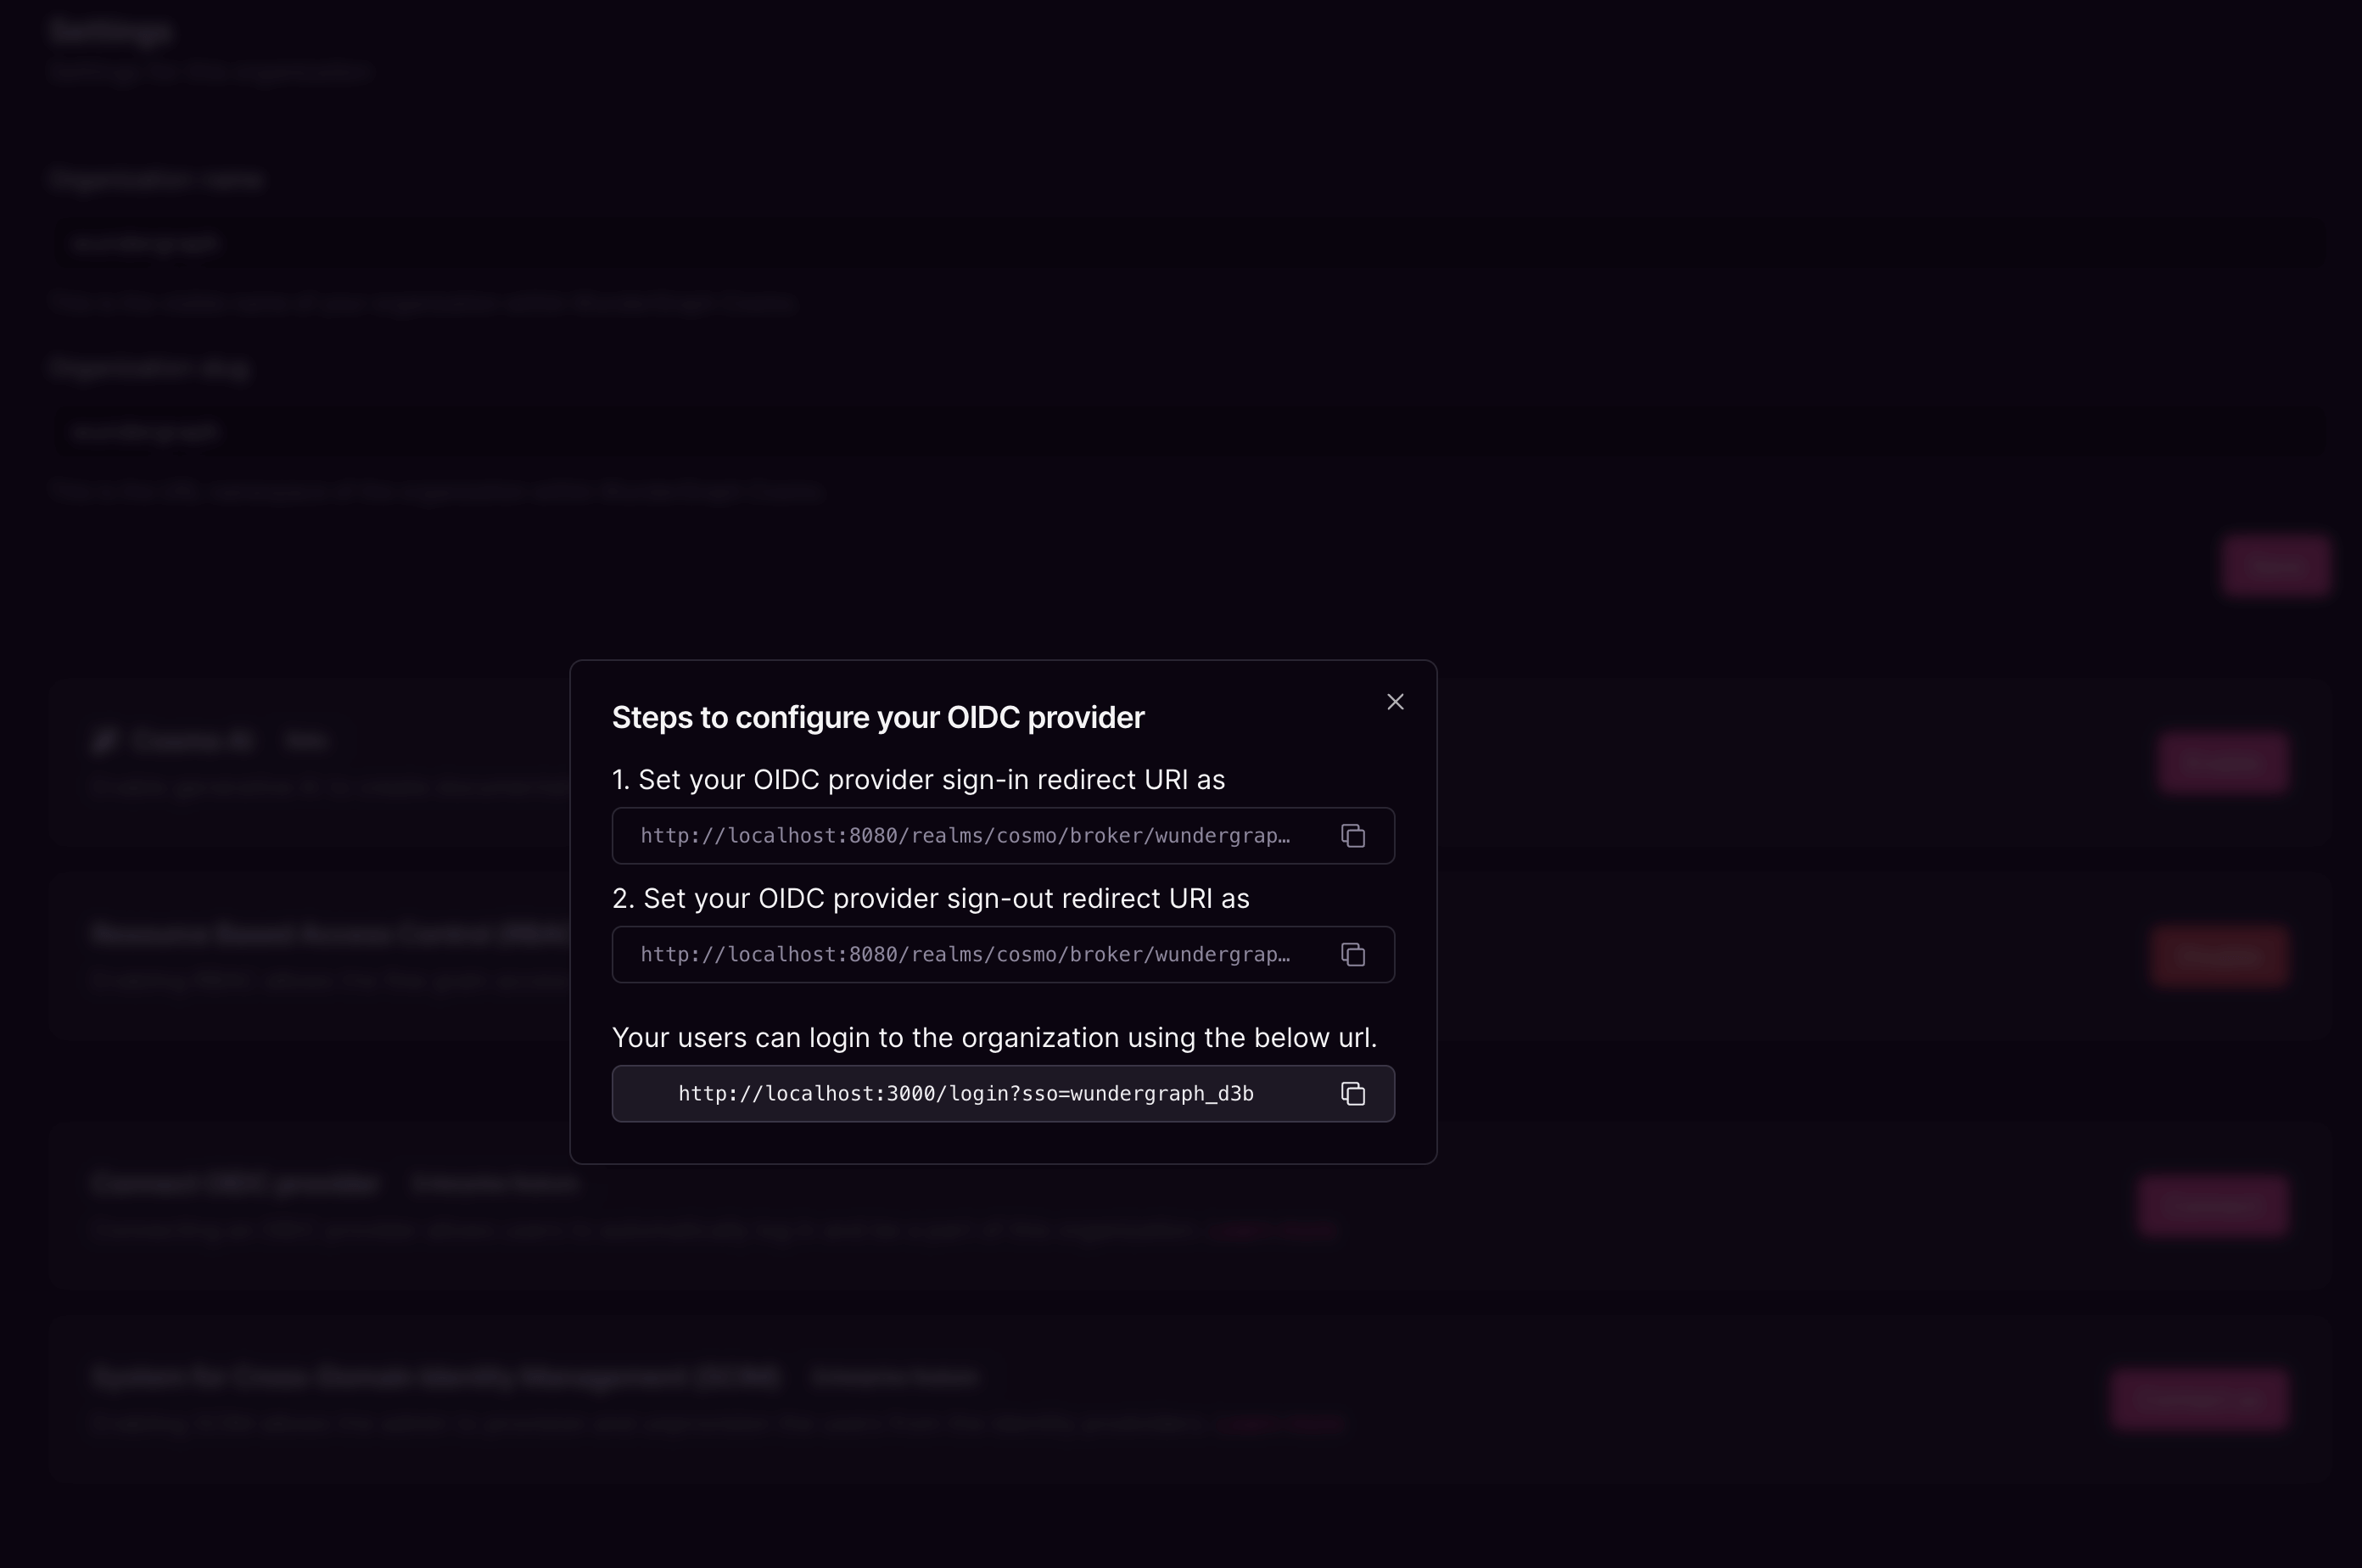
    Copy the sign-in and sign-out redirect URIs displayed in the dialog.
    <Frame>
      <img src="https://mintcdn.com/wundergraphinc-docs-fix-3303-emit-event-rename/bxKGTA1A0T39pAoA/images/studio/sso/oidc-provider-configuration-steps.png?fit=max&auto=format&n=bxKGTA1A0T39pAoA&q=85&s=370e69154da977a892669768c3bbdd1b" alt="Steps to configure OIDC provider with sign-in and sign-out redirect URLs" title="OIDC provider configuration steps" width="2784" height="1848" data-path="images/studio/sso/oidc-provider-configuration-steps.png" />
    </Frame>
  </Step>

  <Step>
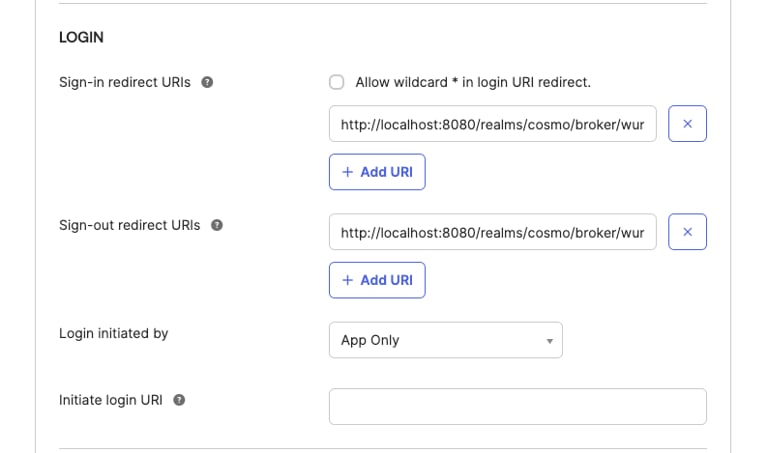
    Navigate back to the application created on Okta and populate the Sign-in and Sign-out redirect URIs with the above-copied values. Click on **Save**.
    <Frame>
      <img src="https://mintcdn.com/wundergraphinc-docs-fix-3303-emit-event-rename/bxKGTA1A0T39pAoA/images/studio/sso/login-configuration-with-redirect-urls.png?fit=max&auto=format&n=bxKGTA1A0T39pAoA&q=85&s=11f64f4720af2bb4a84ebf9ff4b7bf52" alt="Login configuration specifying sign-in and sign-out redirect URIs and login initiator" title="Login configuration with redirect URLs" width="768" height="453" data-path="images/studio/sso/login-configuration-with-redirect-urls.png" />
    </Frame>
  </Step>

  <Step>
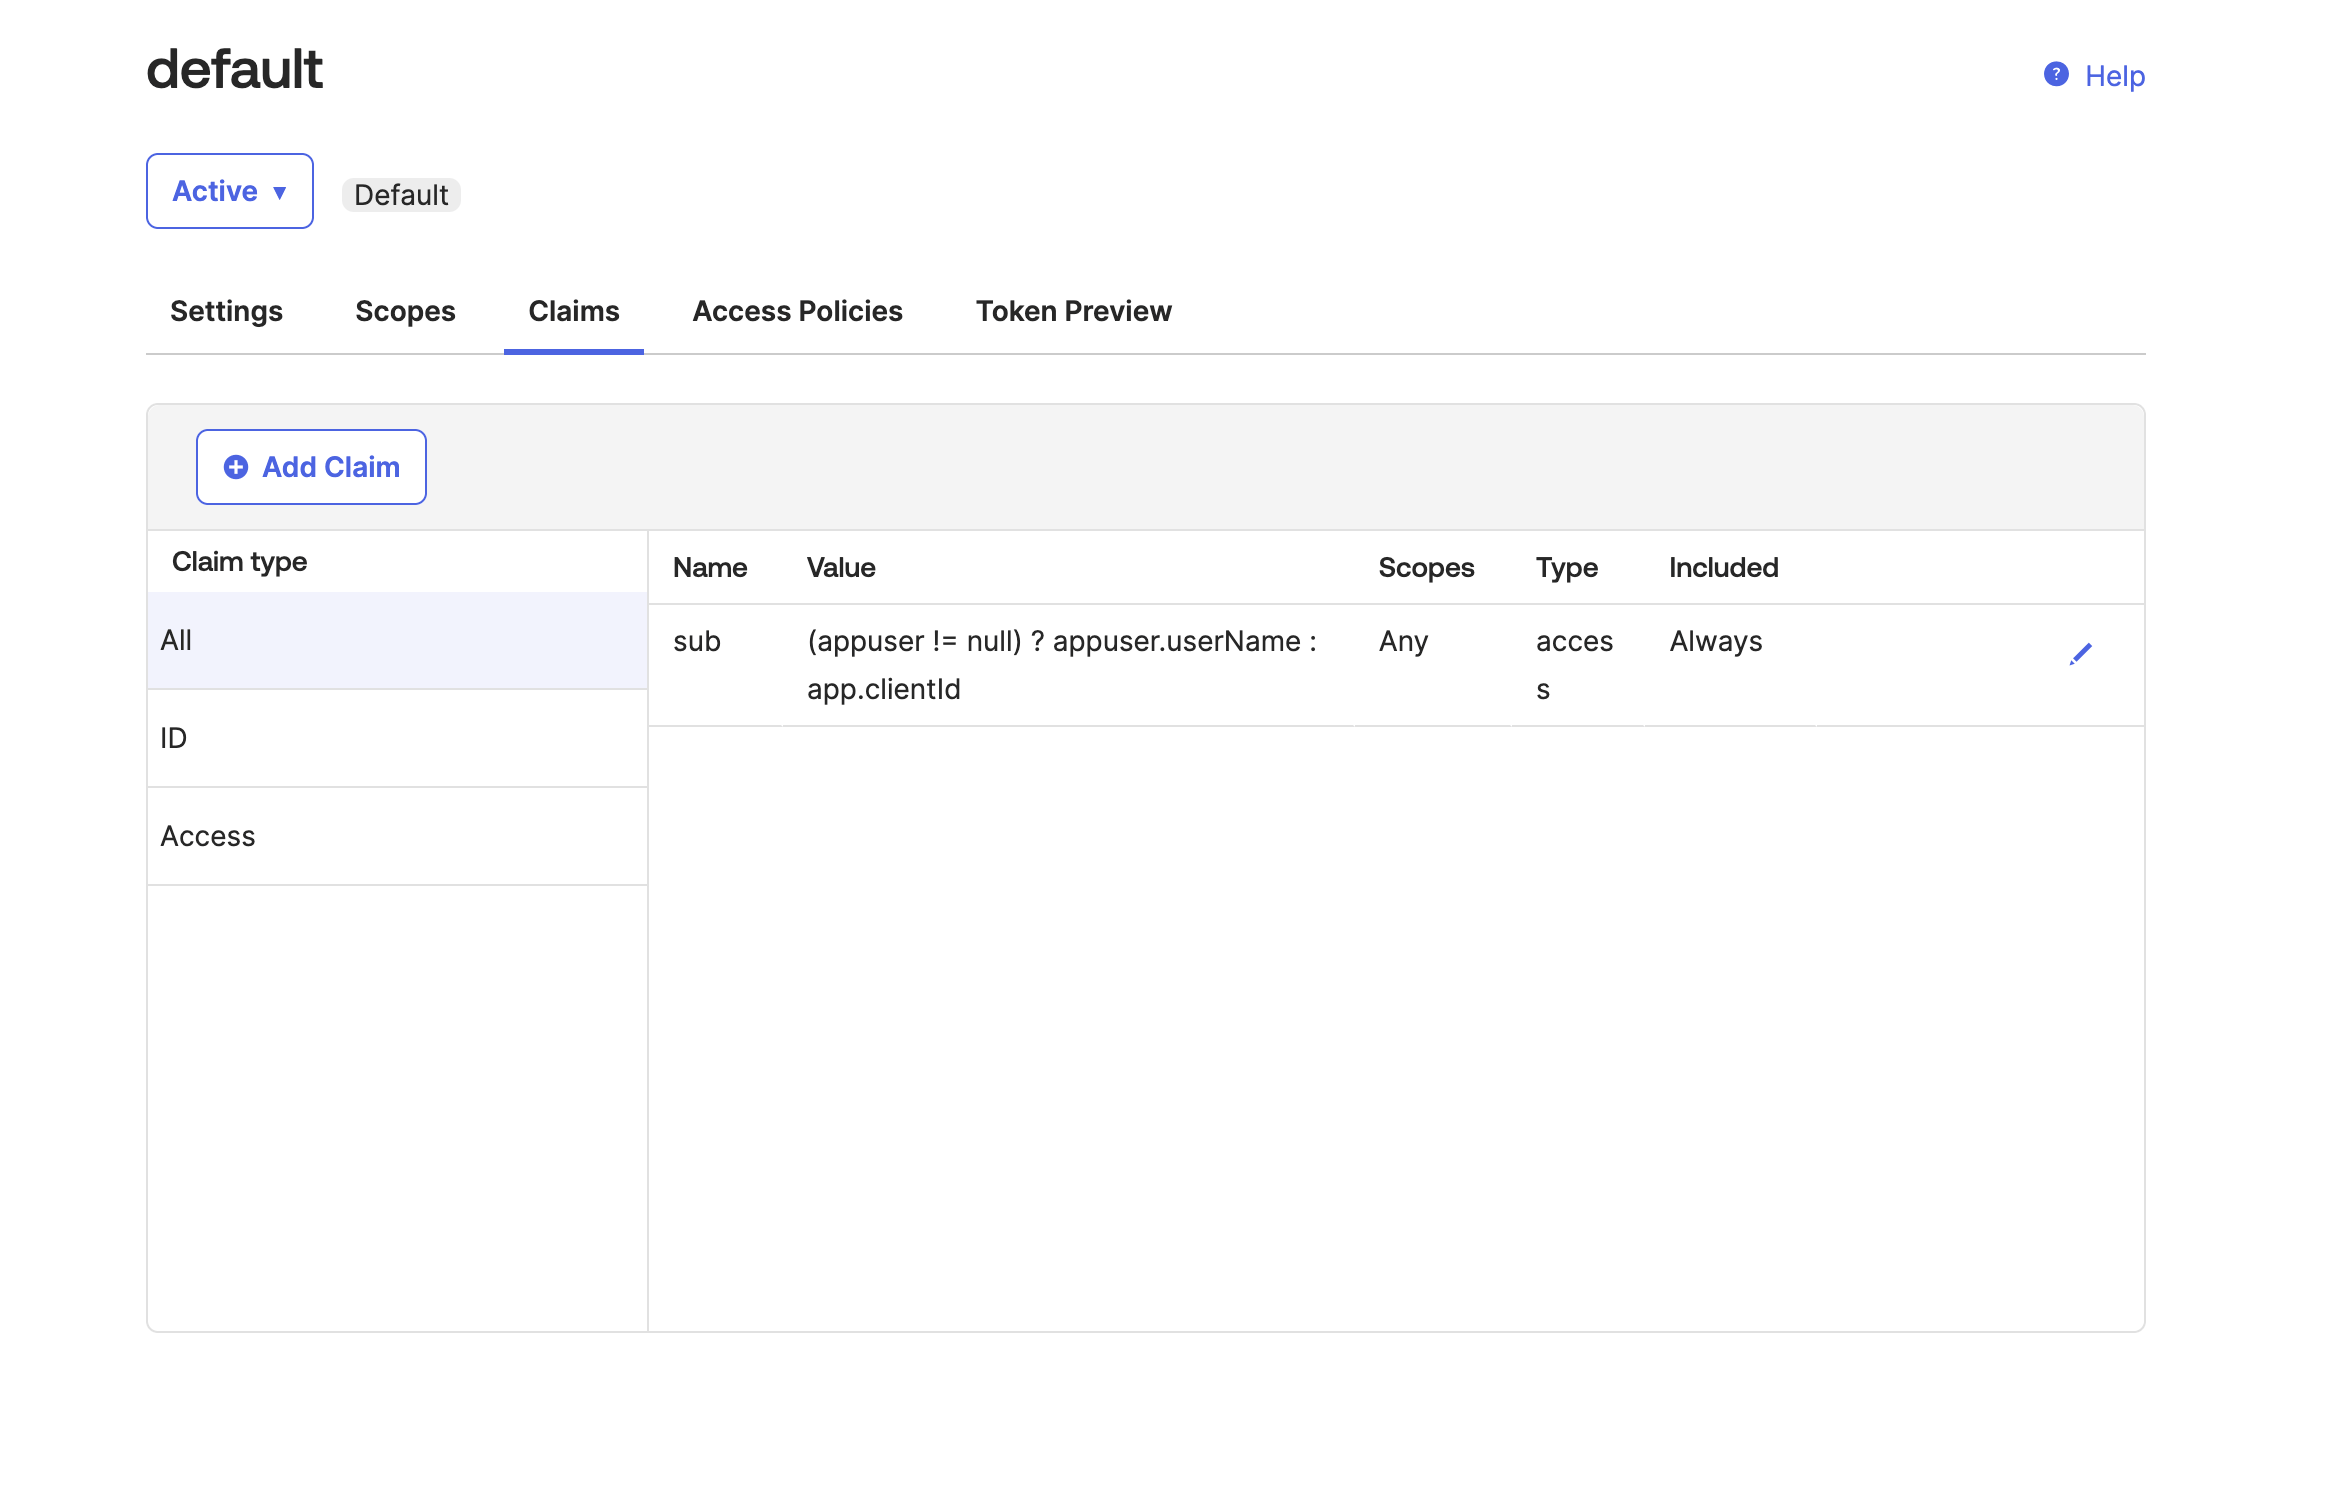
    Navigate to Security-> API, and click on the **default** auth server. Navigate to the **claims** tab and then click on **Add Claim.**
    <Frame>
      <img src="https://mintcdn.com/wundergraphinc-docs-fix-3303-emit-event-rename/bxKGTA1A0T39pAoA/images/studio/sso/access-policies-with-token-preview.png?fit=max&auto=format&n=bxKGTA1A0T39pAoA&q=85&s=0e00feb38763b43379c9ed57d14cf98f" alt="Access Policies section showing claims list and Token Preview button" title="Access Policies with Token Preview" width="2340" height="1496" data-path="images/studio/sso/access-policies-with-token-preview.png" />
    </Frame>
  </Step>

  <Step>
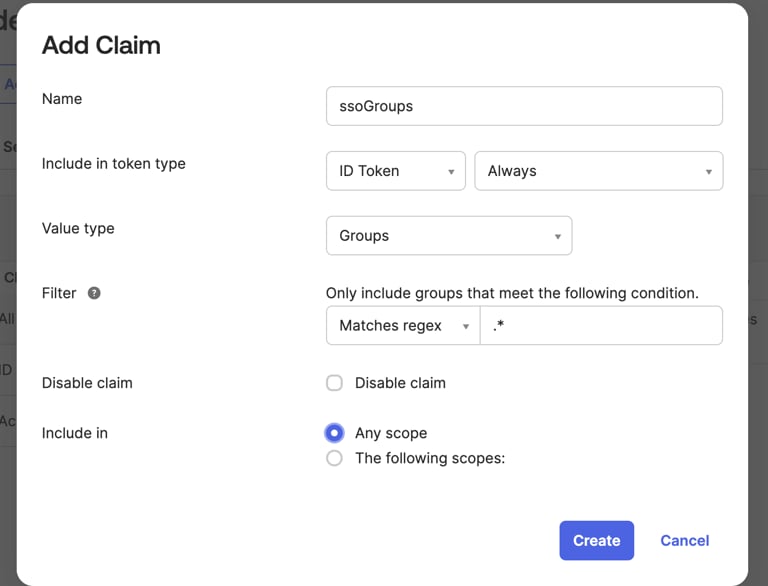
    Name the claim "ssoGroups", and include it in the **ID Token,** for the value type select **Groups,** and  for the filter select **Matches regex** and populate the field with  **".\*".**Click on **Create.**
    <Frame>
      <img src="https://mintcdn.com/wundergraphinc-docs-fix-3303-emit-event-rename/bxKGTA1A0T39pAoA/images/studio/sso/add-claim-dialog-for-group-filters.png?fit=max&auto=format&n=bxKGTA1A0T39pAoA&q=85&s=7c86ab53e30f14d2f2a0fdc1956d6e64" alt="Add Claim dialog for ssoGroups with filters, scopes, and create button" title="Add Claim dialog for group filters" width="768" height="586" data-path="images/studio/sso/add-claim-dialog-for-group-filters.png" />
    </Frame>
  </Step>

  <Step>
    Now you can assign users/groups to the application, and those users will be able to log into Cosmo using the URL provided on setting up the provider.
  </Step>
</Steps>

<Info>
  Please make sure that the users added to the application have a username.
</Info>